Decorative wall molding covers everything from adhesive foam trim you can stick up between coffee and lunch to a commissioned boiserie install that needs a millwork specialist.
What settles the choice is how much wall you are willing to give up: a narrow strip at the mirror’s edge, the lower third behind chairs, or the full floor-to-ceiling treatment.
The proving detail is in the two-weekend budget for combination panel and fluted molding, where one weekend goes to installation and the second to caulk and paint.
[link-whisper-related-posts]1. Board and Batten
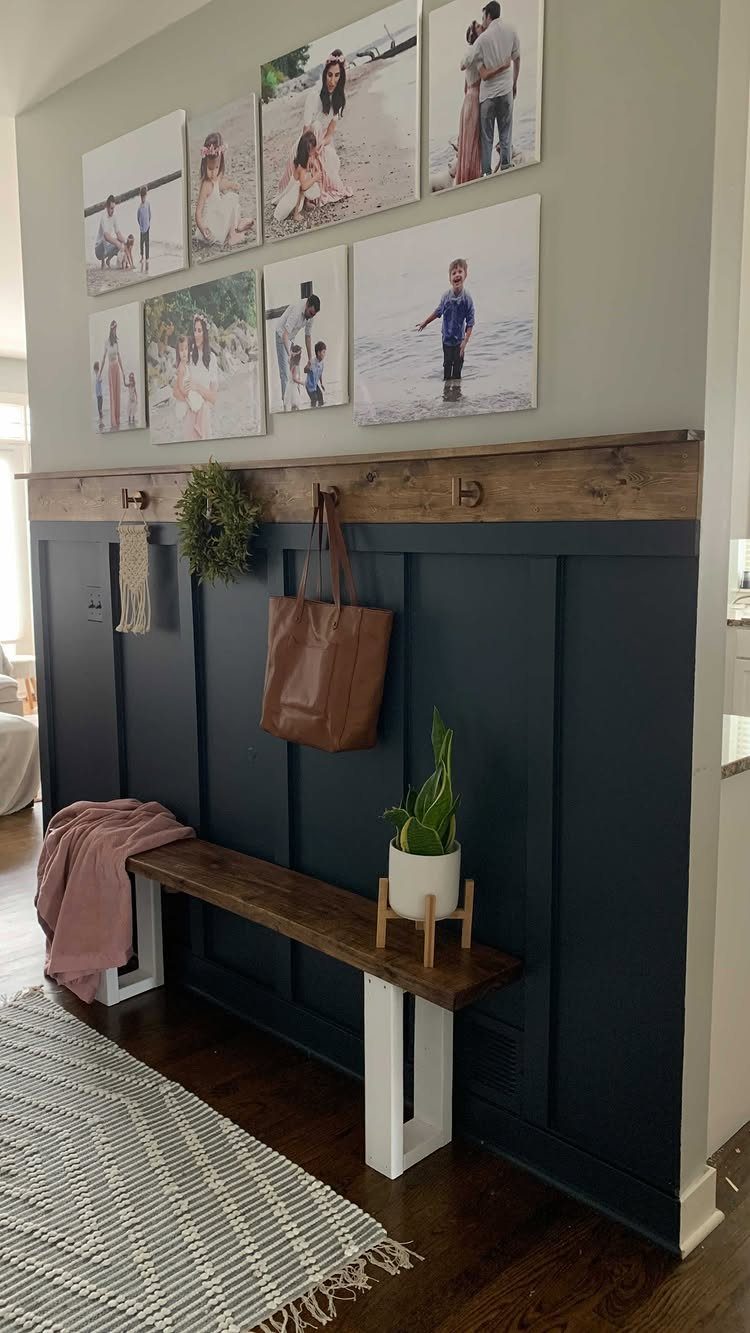
Board and batten started as exterior siding, covering panel seams with vertical strips to keep wind and water out. Inside, that same layered geometry reads rustic and informal, less fussy than ornate alternatives.
The strips run from floor to ceiling or stop at a chair rail, depending on how much wall you want to break up. For a weekend project, paint-grade pine keeps costs down and forgives uneven cuts.
I’d pick this one for a narrow hallway or entry that needs visual weight without clutter.
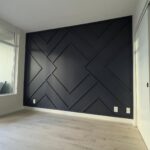
A dark color on the battens against lighter panels flattens the whole wall into pure pattern, which is what you’re seeing above.
2. Picture Frame Molding
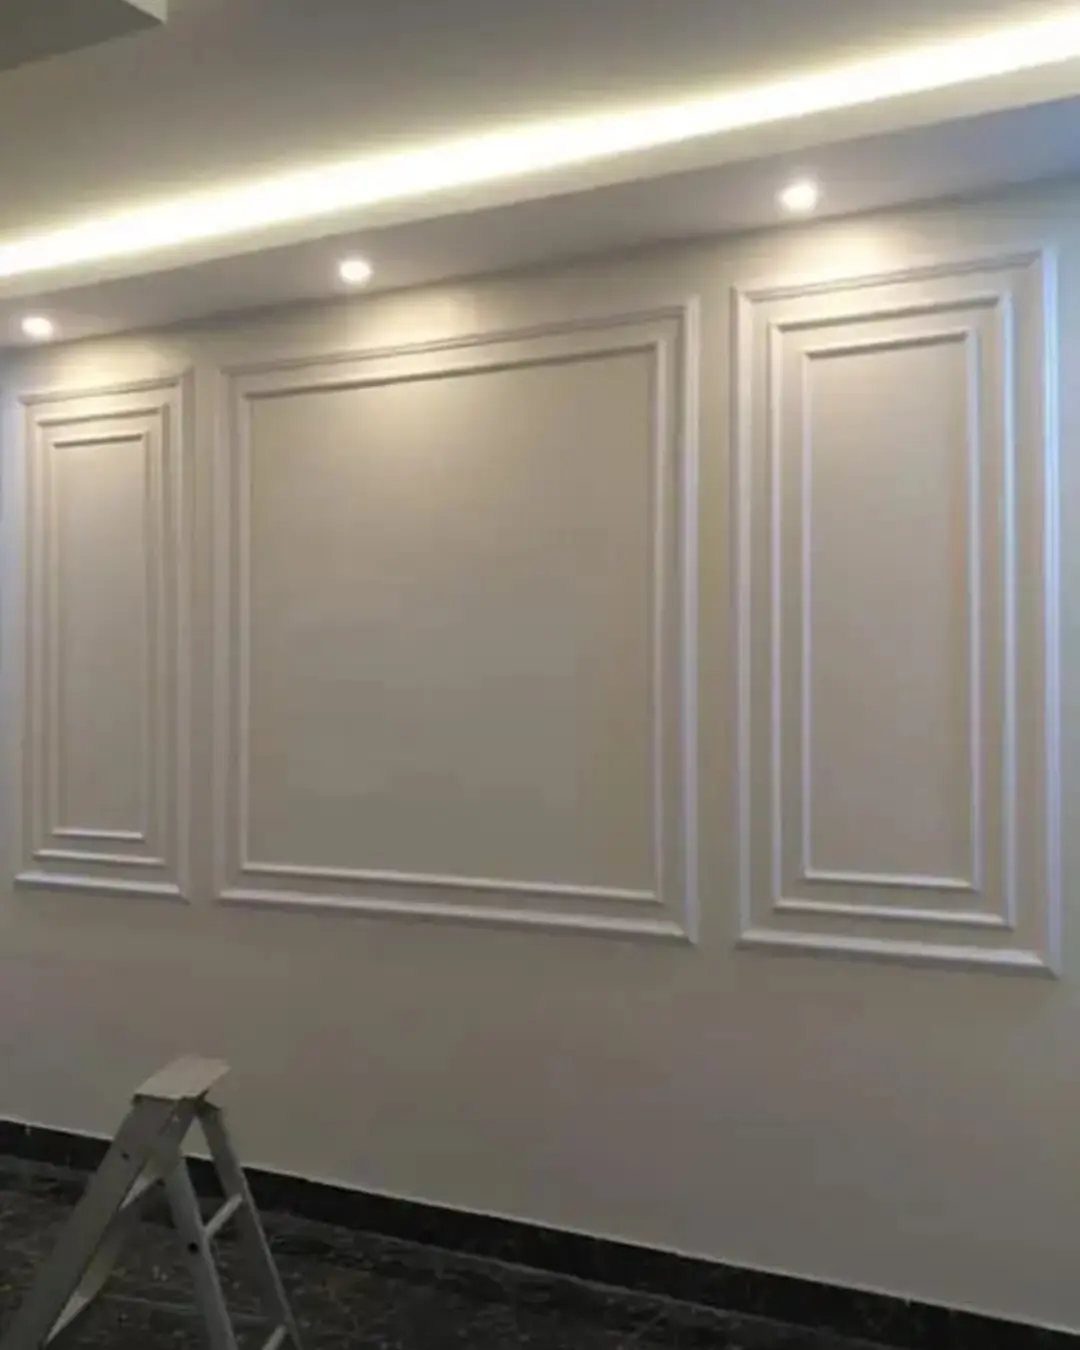
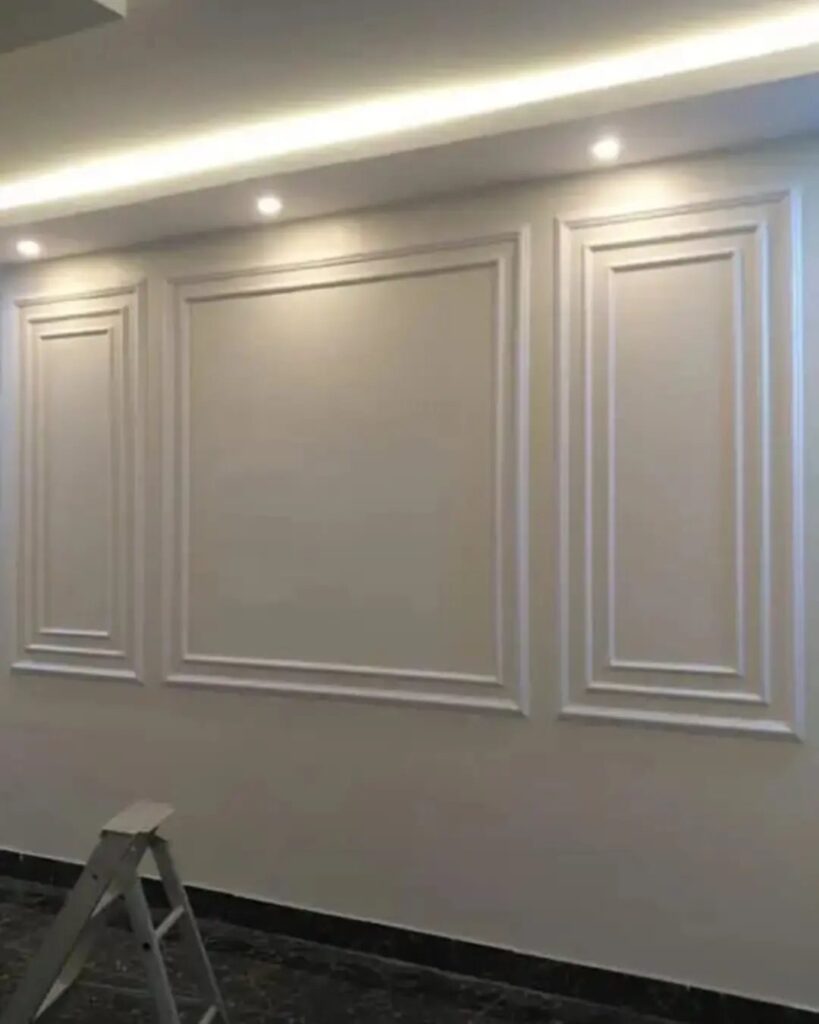
Picture frame molding boxes a section of wall in four pieces of trim, nothing more.
The effect is architectural and old-world, and the install is forgiving: miss a miter by a degree and caulk hides it better than with crown or base.
Size the boxes to your ceiling height. Taller rooms can carry deeper, more detailed profiles; standard-height ceilings want simpler, narrower stock or the frames compete for attention.
I like them running at shoulder height in a dining room, where the geometry reads as wainscoting without the lumber bill.
Variation comes from spacing: tight clusters read gallery-like, a single large frame anchors a bed or sofa.
3. Wainscoting
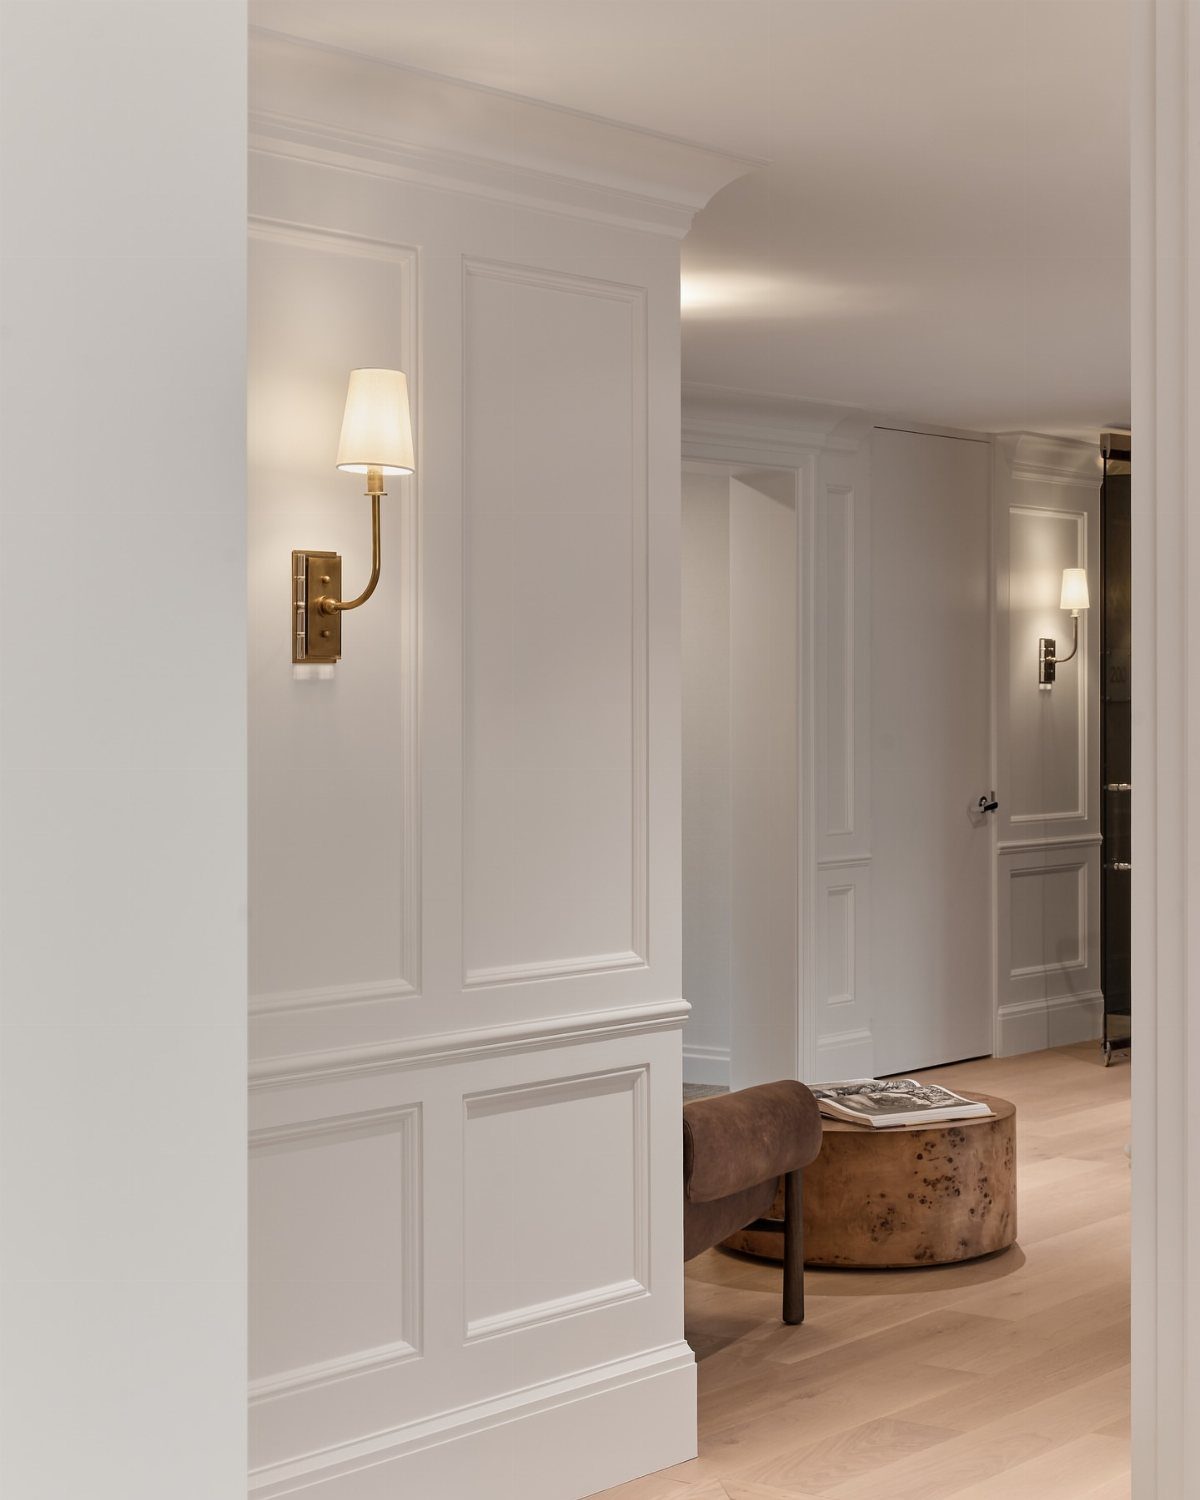
Wainscoting covers the lower third or half of a wall, capped with a chair rail that catches chair backs and scuffs before the plaster does. Raised-panel wainscoting reads the most formal, with beveled edges that catch light and shadow.
The rail height matters more than most people guess. Too low and the panels look squat; too high and the wall feels top-heavy.
In a room with standard ceilings, I measure to the bottom of my window sills and match that line around the room if I can.
For a first attempt, pre-made raised-panel kits save the machining. Paint everything one color and the joints disappear into a single sculptural surface.
4. Decorative Wall Trim Borders
Decorative wall trim borders do the finishing work: they frame a mirror, hide a gap where flooring meets wall, or add a thin line of detail where the eye expects blankness.
Lightweight versions go up with adhesive and a few brads, no heavy lumber to wrestle.
What you gain in speed you trade in durability.
Foam and resin trims dent easier than wood, and a border that reads crisp in a photo can look toy-like in person if the profile is too deep or the scale too large for the room.
Check the width against your baseboard; a border that outranks it looks accidental.
I’d use this where the wall itself is the problem, not where I want a centerpiece.
5. Ornate French Boiserie Molding
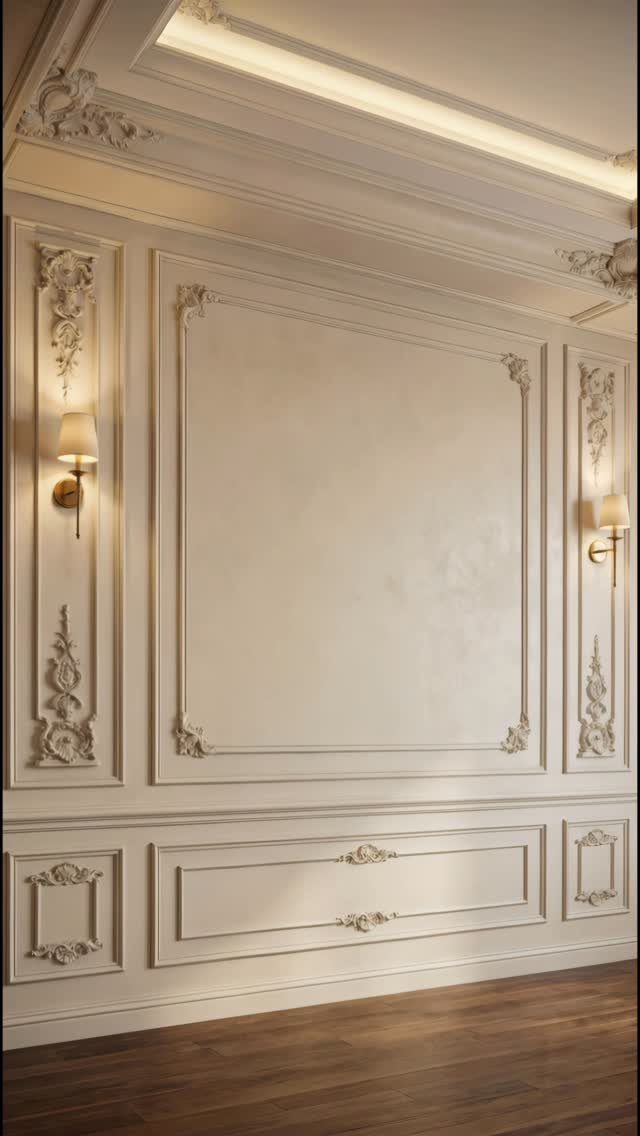
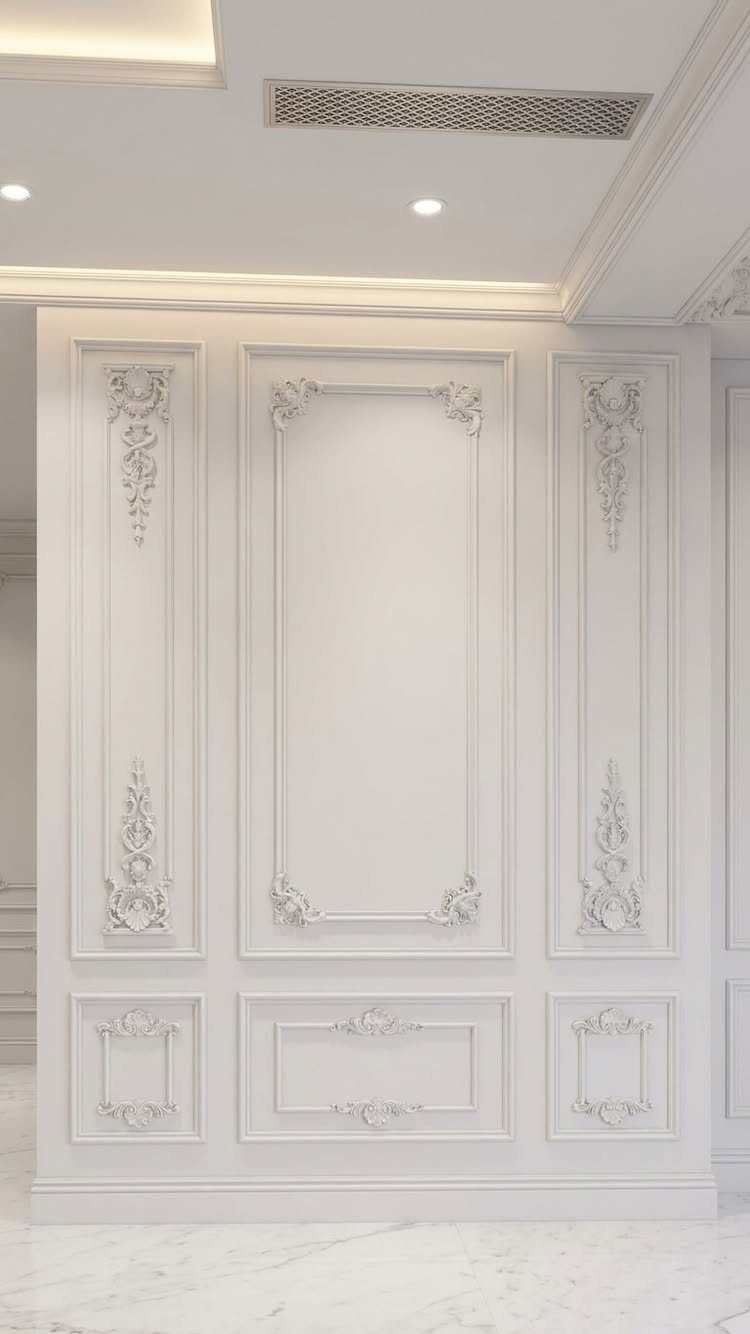
Ornate French boiserie is carved plaster or hardwood paneling at its most declarative: scrolls, flowers, corner flourishes, the full vocabulary of classical decoration. Cream paint keeps the carving visible without the starkness of white-on-white.
This is not a weekend install. The panels come sized to order, and the fitting around outlets, vents, and door casings needs patience or a millwork specialist.
Budget drives most of the practical decisions: resin appliques glued to flat stock give the silhouette at a fraction of the cost, though they won’t take the same stain or age the same way.
I’d reserve this for a single wall in a room that already has the furniture to match the formality. Everywhere else it tilts toward stage set.
6. Gold-Trimmed Accent Molding
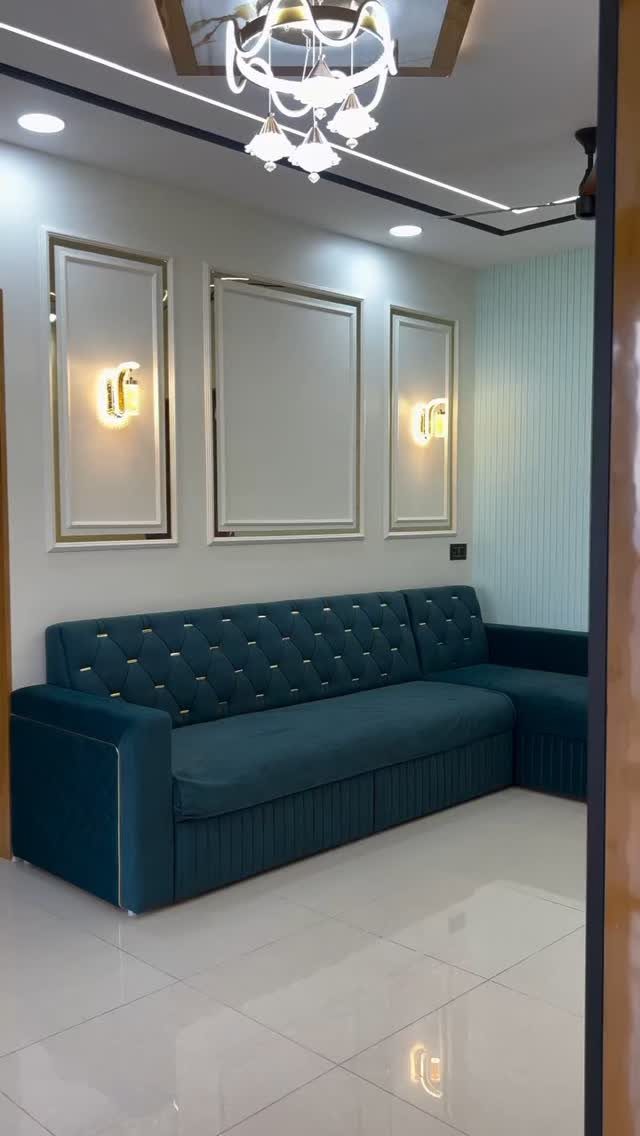
Gold-trimmed accent molding takes a simple white frame and adds a thin metallic line at the inner edge, enough to catch lamplight without announcing itself as "gold wall."
The restraint is the point; the metal reads as shadow line until evening, when it warms up.
The finish matters more than the profile. Real leaf needs sealing and a steady hand; metallic paint or tape is more forgiving and easier to touch up.
I prefer tape for a first try: it lays flat, carries no brush marks, and peels clean if the placement is off.
This suits a room with other metal already in play, a chandelier or sconces that the trim can answer without matching exactly. Too many gold edges and the room turns jewelry box.
7. Combination Panel and Fluted Molding
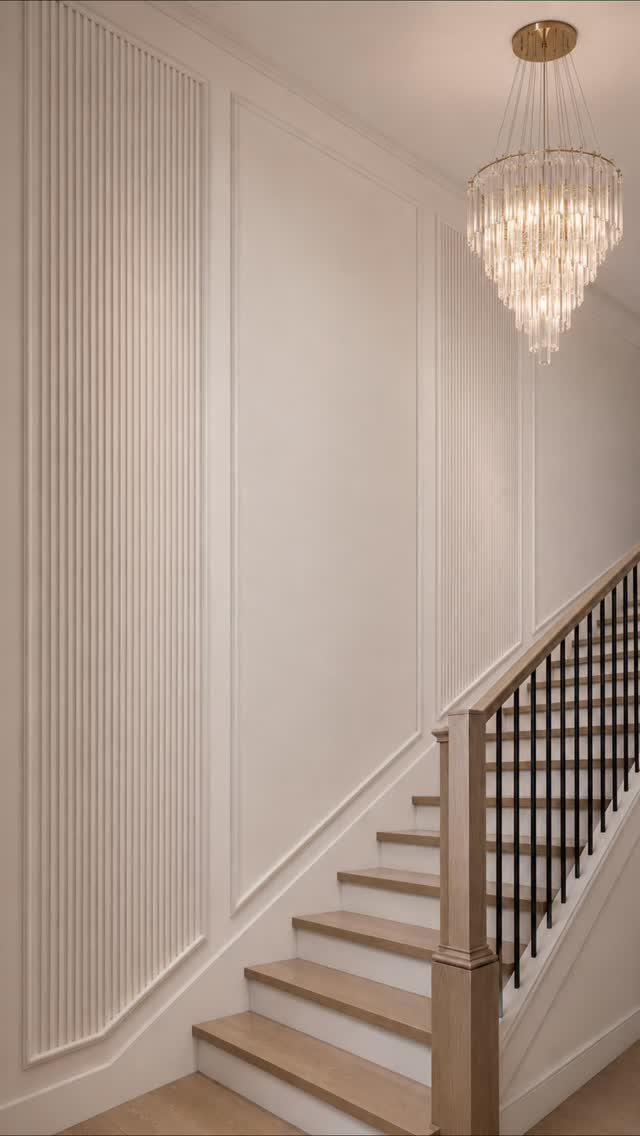
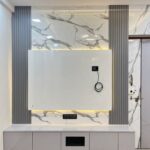
Pairing picture frame molding with fluted paneling lets you split a tall wall into readable layers without adding color.
Keeping both treatments in the same off-white reads as texture rather than pattern, which is what saves this combination from looking busy in a smaller room.
I would paint the frames and flutes in matching satin finish so the shadows do the work. PVC panels work here if you want something lighter than solid wood and easier to wipe down near a high-traffic stair.
This idea eats more hours than a single treatment because you are leveling two systems to meet at corners.
I would not attempt it on a wall shorter than 8 feet; the flutes need vertical run to look intentional, and the frames need room to sit between chair rail height and whatever crown you have.
Budget two weekends: one to lay out and install, one to caulk and paint.
Molding Benefits
Moldings do more than decorate a wall; they solve the problems plain drywall leaves behind. A room without trim reads unfinished because the eye catches every corner where materials meet.
Crown molding draws attention upward, which reads as height even when the ceiling stays the same 8 feet. Baseboard grounds the floor line so furniture doesn’t look dropped onto bare plaster.
Color matching matters more than most people expect. Paint everything the same shade and the molding becomes architecture, not applique.
The joints between frame and wall disappear, and the whole surface reads as one carved plane.
For renters or anyone testing the look, adhesive-backed and peel-and-stick trims now exist in quarter- to 2-inch stock.
They go up without nails, patch with spackle, and carry the same visual weight as permanent installs at roughly the same price point.
Installation Tips
Installation starts with the wall, not the saw. Uneven drywall telegraphs through thin stock; a quick skim with joint compound where the trim will sit saves hours of caulk later.
I mark stud locations, then pre-drill every hole to prevent splitting, especially in paint-grade pine.
Lightweight foam and resin trims go up faster than wood but need closer stud spacing; they sag between fasteners if you treat them like solid stock. Check the packaging for maximum span, then cut it by a third for insurance.
For picture frame molding, miter clamps matter more than the saw itself. A cheap miter box with a hand saw and two clamps gives truer corners than a sliding compound miter saw held freehand.
Caulk hides minor gaps, but only if the error is under 1 degree; beyond that, the shadow line betrays you.
Styles and Materials
Material choice drives both cost and longevity. Solid wood takes stain, ages predictably, and resists dents that would crater foam.
PVC and polyurethane survive moisture near bathrooms or basements where wood swells, though they don’t take paint the same way; the surface stays slightly plastic and can read shiny under direct light.
For a first attempt, that trade usually pays.
Color availability runs wider than people assume. Beyond white and off-white, manufacturers now stock grays, deep blues, and black in both paint and primer.
Matching the trim to the wall color rather than contrasting it is the newer move; it flattens the detail into texture and reads calmer in small rooms.
Modern Trends
High-contrast installs used to be the thing, but current work keeps frames and fields in the same family, letting shadow do the patterning. The look ages better because it doesn’t tie itself to a trend color.
What reads as timeless is permanence itself. A built-in detail doesn’t follow the paint cycle; it stays through furniture swaps and flooring changes.
That durability is why molding climbs in popularity even as other "statement" features fall off.
The streamlined modern look still has its place. Flat stock with minimal profile, painted to match the wall, gives the same finished edge without the historical reference.
It suits rooms where the architecture is already busy, or where the goal is calm rather than character.
Frequently Asked Questions
What is decorative molding on walls called?
It goes by a few names: trim, millwork, or simply molding. All of them mean the same thing, decorative strips added to walls, ceilings, or the joints between them to give flat surfaces some architectural character.
Some of it is purely decorative, like picture frame molding, and some serves a function too, like baseboard that catches scuffs before the wall does.
What are popular wall molding styles?
Board and batten, picture frame molding, and wainscoting are the ones I see most in weekend projects right now.
Crown molding and baseboard still show up in almost every room, though they are more about finishing the edges than dressing the wall itself.
Picture frame molding gives you the wainscoting look without buying actual boards for the full height, and board and batten fits tight spots where you want some presence without visual noise.
How do I attach decorative molding to the wall?
Foam and resin trims are light enough for construction adhesive and a couple brad nails, which speeds up the install though they ding more easily than solid wood.
Solid wood molding needs a nail gun or finish nails into studs, plus construction adhesive on the back for anything that might warp.
For paint-grade pine, I use a brad nailer with 2-inch nails, then caulk the joints before painting so the seams disappear.