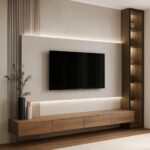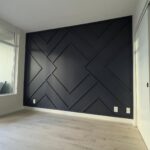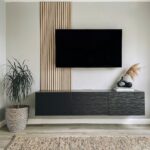
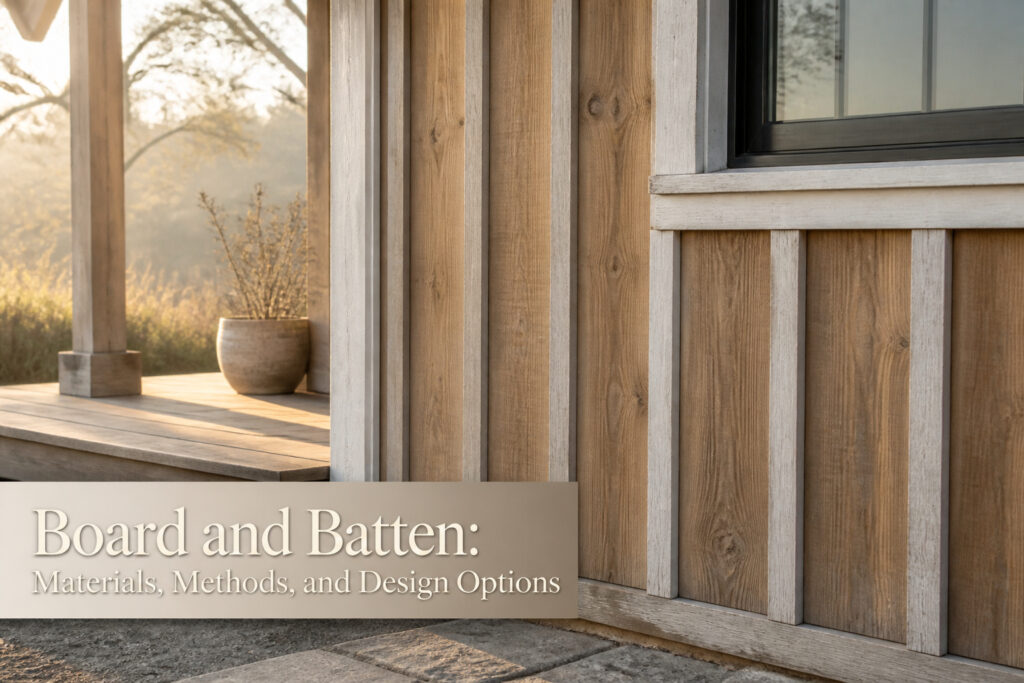
Board and batten is vertical siding built from wide boards with narrow strips fastened over the seams between them. Every choice, from cedar to fiber cement, changes both the cost and the maintenance calendar you are signing up for.
Fiber cement runs about three-quarters of an inch thick and costs more upfront, but it does not invite termites or warp when the weather shifts.
[link-whisper-related-posts]What Board and Batten Is
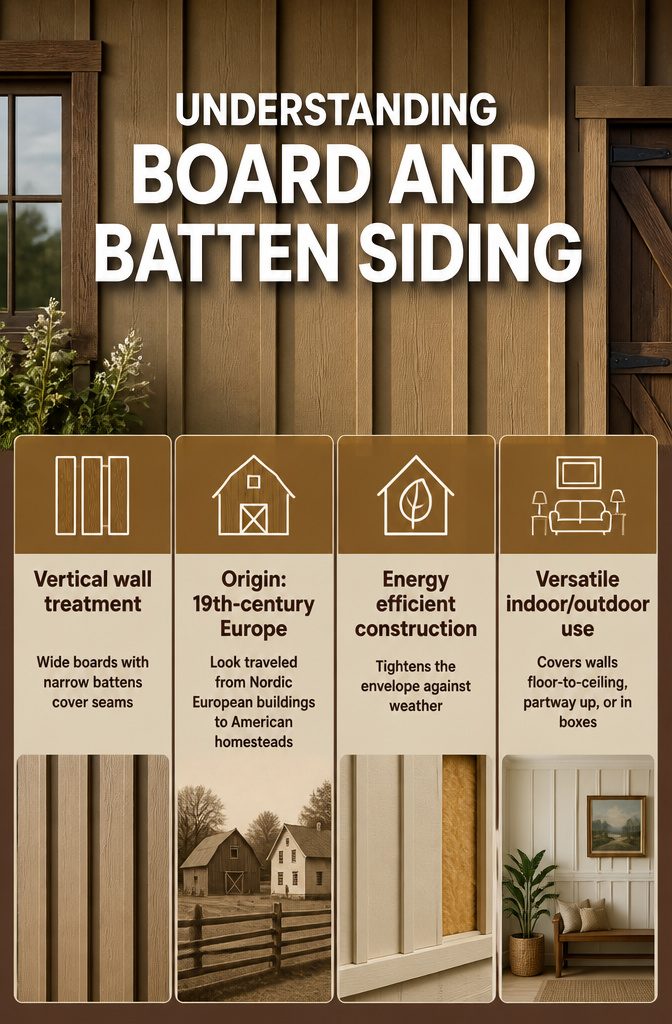
Board and batten siding is a vertical wall treatment built from wide boards with narrow strips, called battens, fastened over the seams between them.
The boards run vertically, and the battens hide the gaps while adding the rhythm that makes the style recognizable.
The look traveled from Nordic European buildings to American homesteads sometime around the middle of the 19th century, where farmers and builders adopted it for barns and houses.
Construction was straightforward: sawmills cut the long boards, and battens went on after to tighten the envelope against weather.
That relative simplicity and the energy efficiency of the finished wall made it practical for people working with limited time and money.
Originally an exterior technique, board and batten moved indoors as paneling and now covers walls floor-to-ceiling, partway up, or arranged in boxes with battens running horizontally as well as vertically.
On exteriors, the wide panels are often the primary siding now, with battens serving as much for visual structure as for covering seams.
The style reads traditional in one room and casual in another, which is why it survives across periods that discard most other colonial details.
Materials That Work
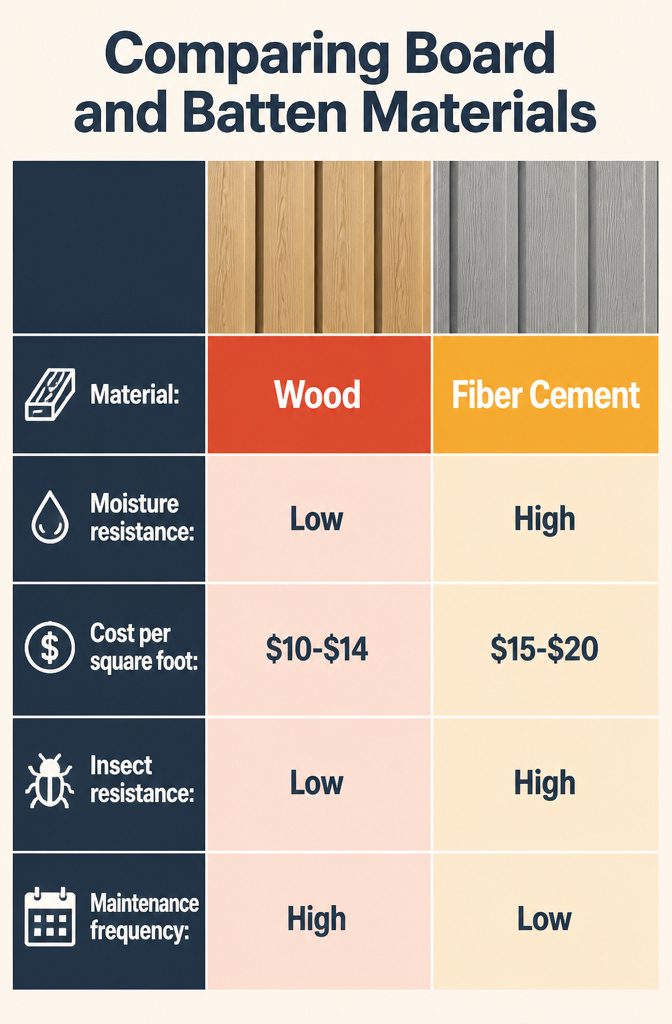
Wood still carries the tradition, and cedar, pine, and cypress are the names that come up when people ask about board and batten done the old way.
Moisture is the real problem. In climates where rain and snow sit against the siding, wood takes damage unless you stay on top of sealing and repair.
Termites find it too. I would not put untreated pine on a north-facing wall in the Midwest and expect it to age gracefully.
Fiber cement changed the calculation for anyone who wants the look without the maintenance calendar. Hardie Panel vertical siding with matching trim batten strips runs about three-quarters of an inch thick and comes with a woodgrain finish option.
It costs more upfront than some alternatives, but you get siding that does not invite insects or warp when the weather shifts.
Vinyl sits at the other end of the price range.
It lasts, resists water, and installs fast enough that a weekend project stays possible. The panels look clean from the street, though up close the seams read as what they are: manufactured, not milled.
Engineered wood splits the difference. Manufacturers bond shredded fibers or sawdust with waterproof adhesives to create boards that look like wood but carry more rigidity and a warranty against hail, rot, and termites.
LP SmartSide is the product most often mentioned for this application, paired with trim to create the batten grid.
Preparing the Wall Surface
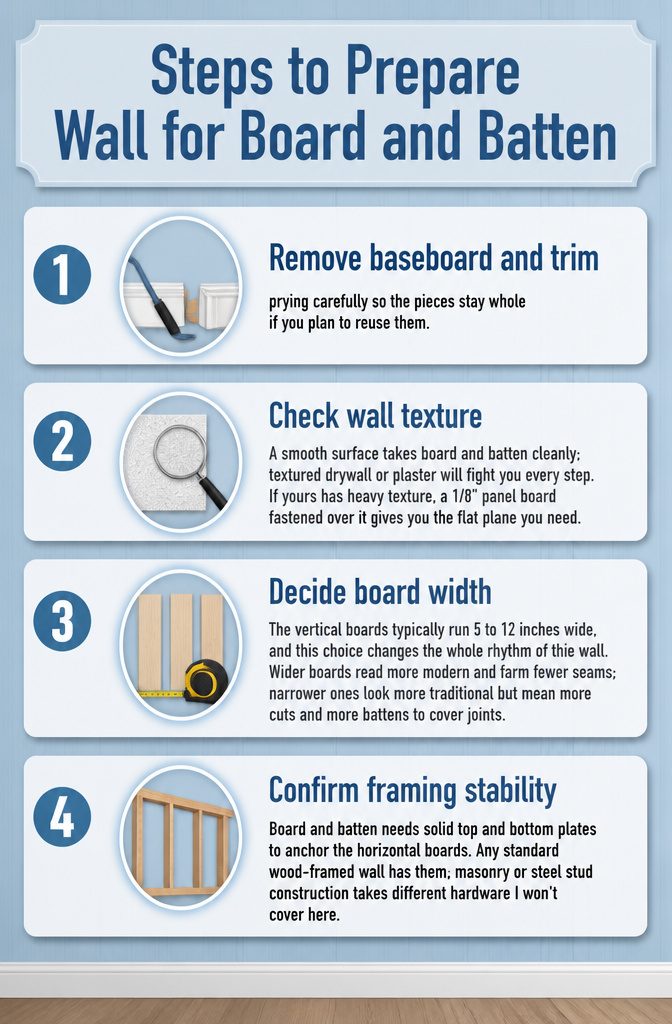
- Remove baseboard and trim first, prying carefully so the pieces stay whole if you plan to reuse them. The wall underneath needs to be free of dust and debris before anything new goes on.
- Check the wall texture. A smooth surface takes board and batten cleanly; textured drywall or plaster will fight you every step. If yours has heavy texture, a 1/8" panel board fastened over it gives you the flat plane you need.
- Decide your board width now, before you cut anything. The vertical boards typically run 5 to 12 inches wide, and this choice changes the whole rhythm of the wall. Wider boards read more modern and farm fewer seams; narrower ones look more traditional but mean more cuts and more battens to cover joints.
- Confirm your framing. Board and batten needs solid top and bottom plates to anchor the horizontal boards. Any standard wood-framed wall has them; masonry or steel stud construction takes different hardware I won’t cover here.
Horizontal Boards Top and Bottom
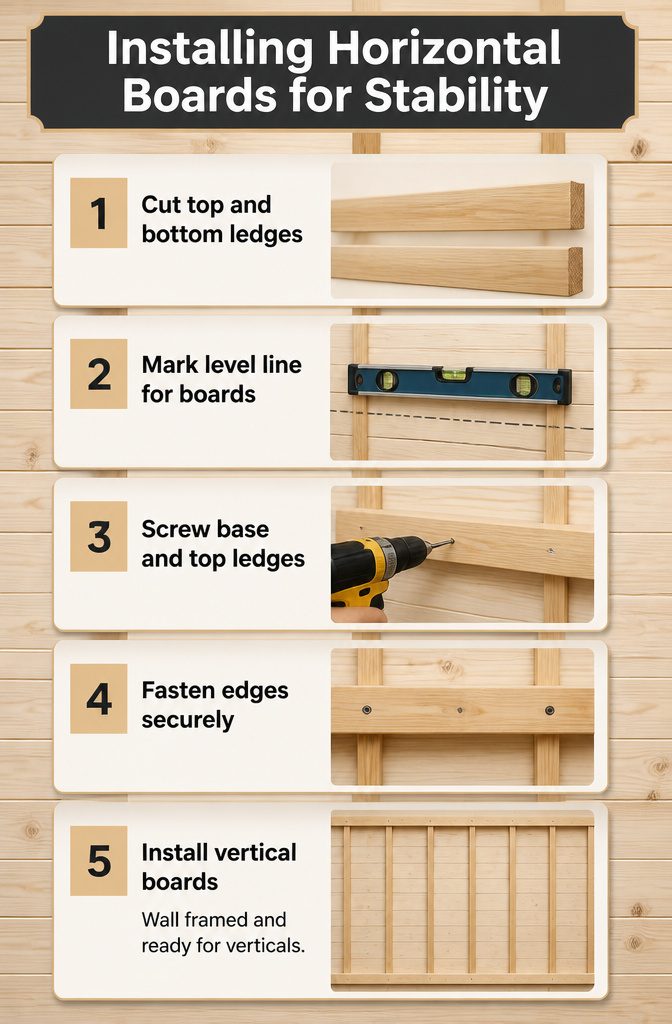
The horizontal boards are what everything else screws into, so getting them level matters more than matching any measurement off the floor.
- Cut a top and bottom ledge to the full wall length. A few inches of width is enough; you are nailing vertical boards to these later, so the grip surface counts more than looks. These boards stay visible only at the edges, so planing or finishing them before install is wasted time.
- Mark a level line for each board, not a distance off the floor. Tile and old subfloors dip and rise; on one run of my own project the mark wandered over half an inch by the time I reached a window. The level line wins every time.
- Screw, do not nail, the base and top ledges into studs or structure. Woodland Mills puts it flatly: every subsequent board builds on these two pieces.
- Fasten the top ledge with its bottom edge on that level mark. Young House Love later switched from skipping this piece to a 1×2 nailed on top; it gives a shelf for art and reads more finished. If you plan to lean anything heavy there, screws again, not nails alone.
With both horizontals secured, the wall is framed and ready for verticals.
Vertical Boards Between the Horizontals
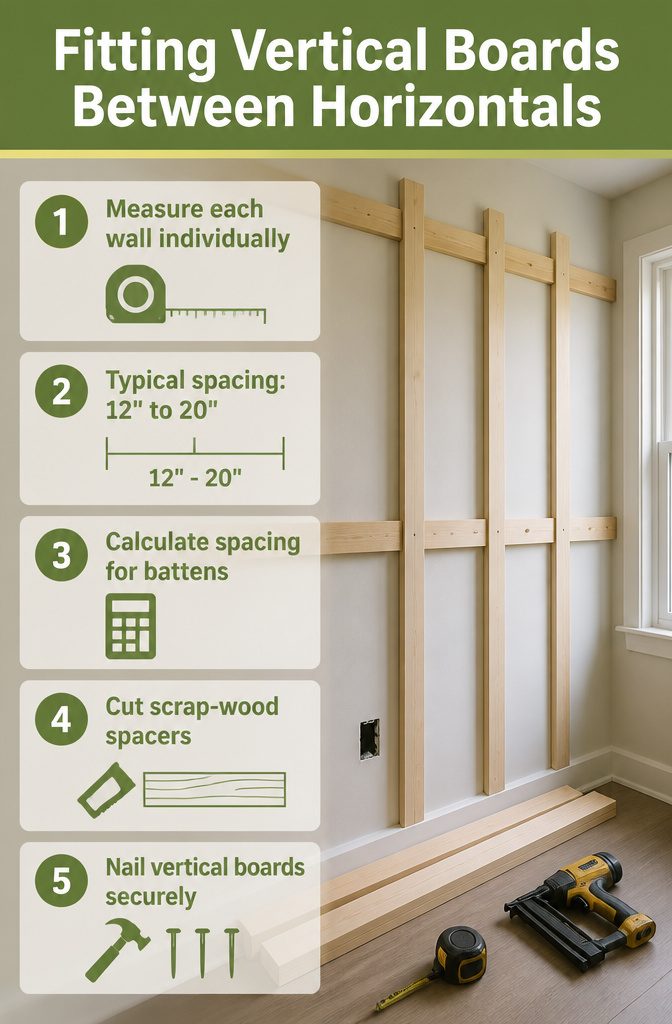
- Measure each wall on its own instead of copying a single spacing across the room. Wall widths vary, and outlets or windows will force adjustments.
- Typical batten spacing runs 12" to 20" apart, with wider gaps working better in larger rooms. Painter’s tape on the wall helps test this before any cutting happens.
- Calculate by wall: subtract the total width of all battens from the wall width, then divide by the number of spaces between them. A 58" wall with five 2.5" battens leaves 45.5" to split across four gaps, or about 11.375" each. Off by an inch or two between walls, and no one notices after paint and fixtures go in.
- Cut a scrap-wood spacer to skip the tape measure each time. For 2.5" battens set 18" center to center, the spacer wants to be 15.5".
- Nail each vertical board in place, measuring individually since walls rarely stay perfectly level. A few nails up and down hold fine; skip the glue behind so removal later does not tear the drywall. Do not hang heavy items from a batten unless you have hit a stud.
Battens Over the Seams
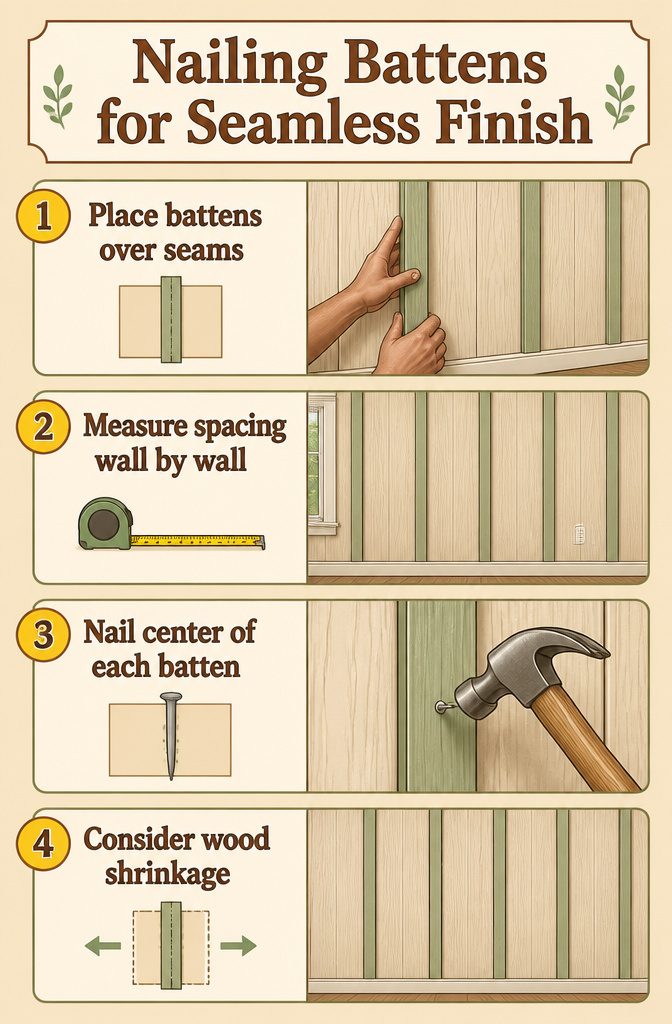
- Place battens over the seams of the vertical boards.
This is the step that makes the whole thing read as board and batten rather than just flat paneling. The battens hide every seam and create the strong vertical lines that cast shadows and give the wall its texture.
Measure spacing wall by wall, not for the whole room. Walls vary in width, and outlets or windows will force adjustments.
On a 58-inch wall with five 2.5-inch battens, that leaves four gaps of roughly 11.375 inches. A spread of 11.5 to 13 inches around the room disappears once the work is done and furniture is in place.
Nail each batten with a single nail dead center, straight into the crease where two boards meet.
This lets the boards move underneath as they dry and shrink without splitting or warping. Do not nail the boards to the battens; that locks them together and guarantees cracks later.
Wood shrinks over time, and exterior boards can lose most of their moisture within the first year.
Interior boards take longer in a climate-controlled space. Battens need to be wide enough to cover the growing gap between boards, or the seam will eventually show through.
Caulk, Fill, and Paint
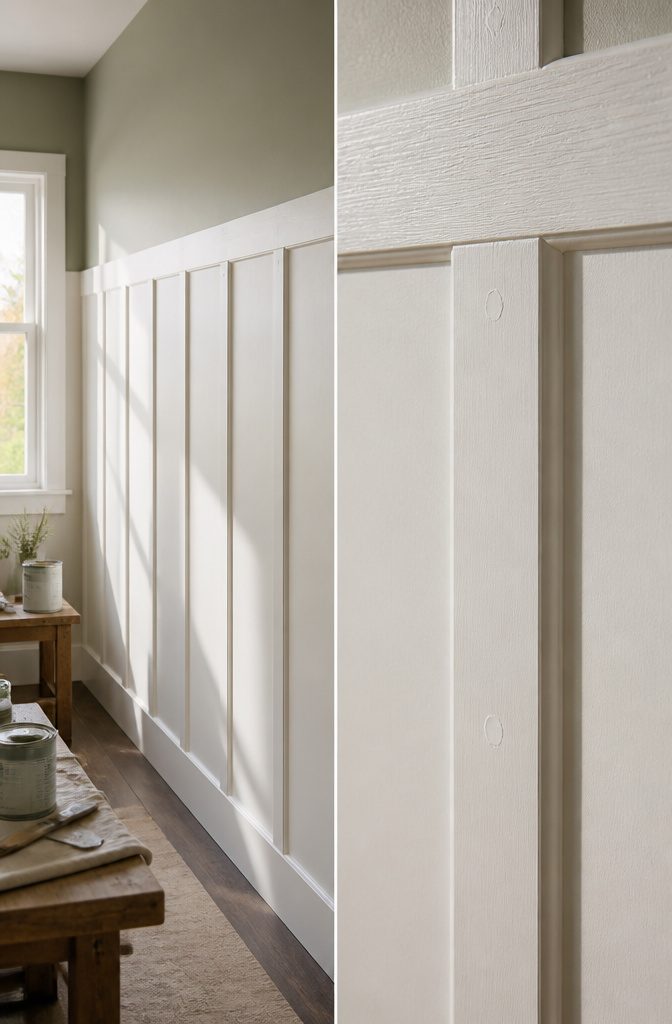
- Caulk every seam where the boards meet the wall or each other, not just the obvious gaps. A thin bead hides bows in the wall and makes the trim look built in, not nailed on. Cut the caulk tube tip small, at a slight angle, so you don’t lay down more than you need. Run a full box of seams before you stop to smooth anything; dip your finger in warm water first and the caulk won’t stick to your skin.
- Fill nail holes with spackle before the paint goes on. A 4-in-1 spackle tool speeds this up: squeeze a dot from the tube, flip it to smooth with the flat back, then sand with the cap pad or switch to a regular sanding block for speed. Dust off with a microfiber cloth or paper towel so the paint doesn’t pick up grit.
- Paint last. The caulk and spackle work is what lets the paint look finished instead of patched, and skipping or rushing it shows through every coat. The thin caulk line and flush nail holes are what make board and batten read as architecture, not a weekend project.
Design Options Beyond Basic
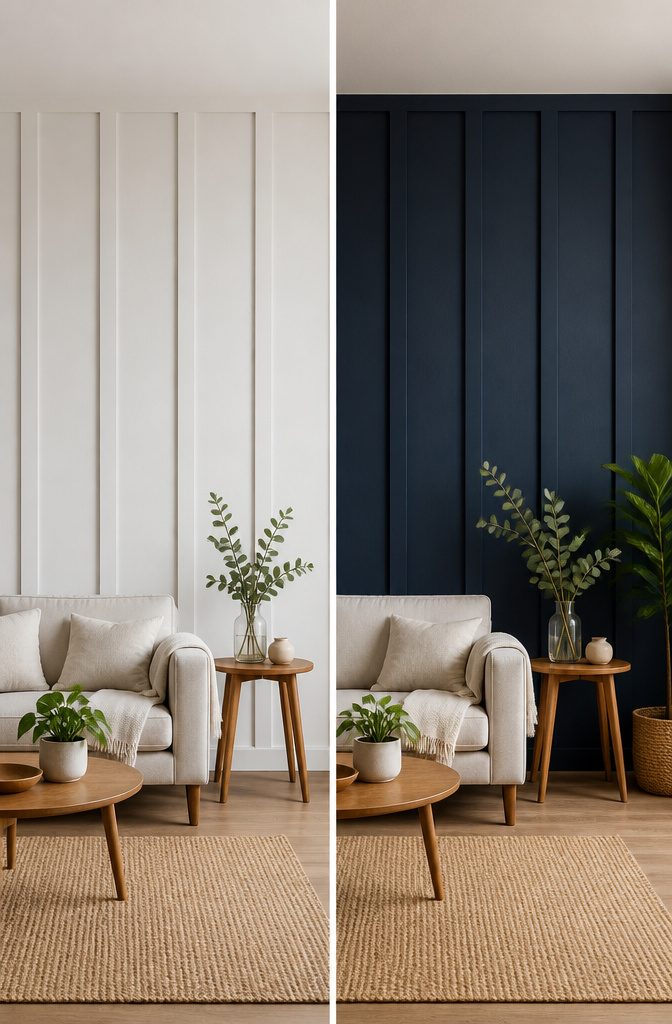
Vertical installation is what most people picture: boards running floor to ceiling with narrow battens covering every seam.
The spacing matters more than people expect at first. Pull the battens too far apart and the wall loses that rhythmic shadow line; keep them tight and the surface reads as texture rather than plank.
Some manufacturers now make this explicit with Hardie® Panel vertical siding and matching 3/4-inch trim batten strips, sized to work together without guesswork.
Accent walls took this exterior idea indoors where the stakes are lower and the budget shrinks to match.
A single board and batten wall behind a bed or sofa gives the vertical emphasis and shadow play without cladding the whole room. A single dramatic wall can read as a "statement wall": all the impact without full architectural commitment.
Mixed materials push the style somewhere traditional board and batten never sat. Metal panels with matching metal battens read industrial or mid-century modern depending on the finish.
Brick behind partial batten strips, or fiber cement Hardie® Board Panel in a woodgrain finish against actual stone, creates the tension that makes a facade feel designed rather than inherited.
The traditional frontier structure was practical; this deliberate mixing is aesthetic, and it works because the vertical rhythm holds steady even when the materials shift.
The adaptation from barn to modern home is less about changing the proportions than about letting the context change the reading. Same boards, same battens, different neighbors.
What It Costs
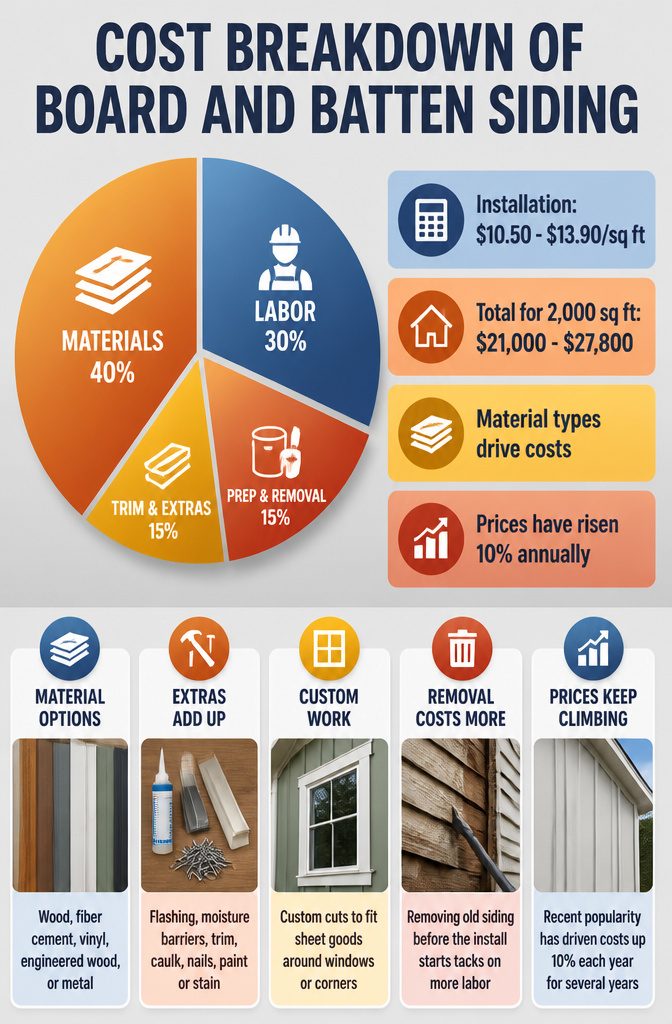
The price tag on board and batten siding lands between $10.50 and $13.90 per square foot for professional installation, materials included.
For a 2,000 square foot house, that shakes out to roughly $21,000 to $27,800 total. Three separate cost estimates back that range: Remodeling Calculator, Forbes, and Angi all line up in the same ballpark.
Material choice drives most of the swing. Wood, fiber cement, vinyl, engineered wood, or metal each carries its own price per square foot, and the extras add up fast.
Flashing, moisture barriers, trim, caulk, nails, paint or stain, and any custom cuts to fit sheet goods around windows or corners all pile onto the base number. Removing old siding before the install starts tacks on more labor too.
Recent popularity has not helped the budget. James Hardie notes that board and batten materials have climbed about 10 percent annually for several years running.
Recent popularity has driven the cost of board and batten materials up by around 10% each year for several years.
For someone mid-project, that trend means the estimate you got last spring is probably low now. It also means ordering materials sooner rather than later, even if the install waits for a free weekend.
Why It Lasts
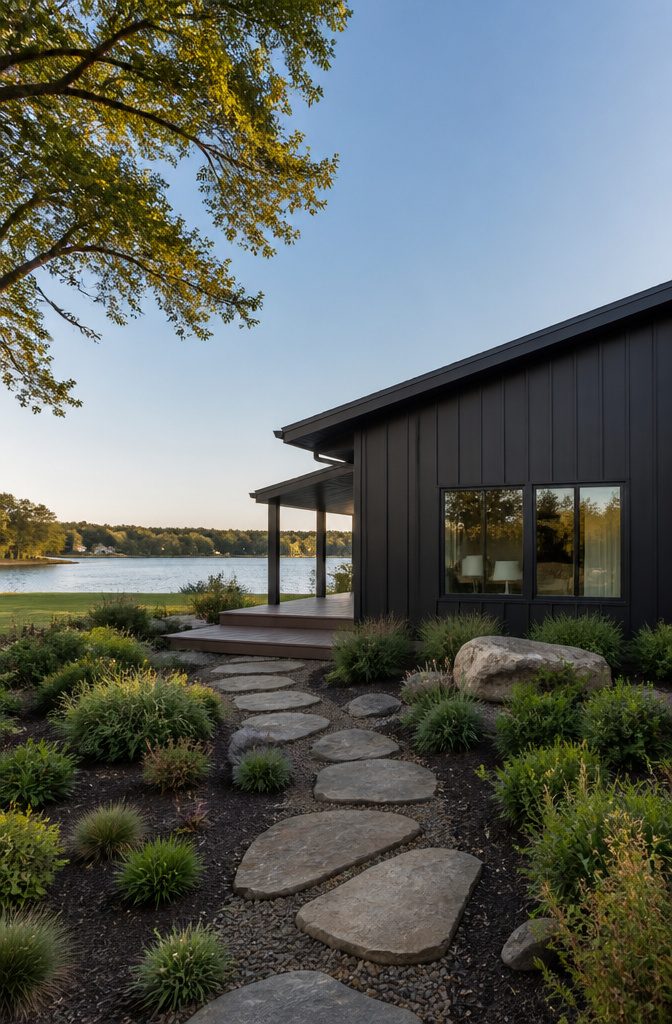
The vertical lines do more than look right. They create a tighter building envelope, because the battens seal the gaps between boards in a way horizontal siding rarely matches.
That extra layer of insulation helps keep interior temperatures steady, which shows up in lower heating and cooling bills over time.
Durability depends heavily on what you actually install. Fiber cement resists rot, pests, and warping, and carries fade-resistant color that holds for decades.
Vinyl runs cheaper upfront and fights moisture well, though its lifespan tops out around 25 years against fiber cement’s longer haul. Wood gives the most traditional appearance but demands the most maintenance, especially anywhere with serious humidity or freeze-thaw cycles.
What sold me on the look for my own place was the curb appeal math. Buyers consistently respond to that farmhouse-meets-modern character, and the siding style has enough history behind it that it does not read as a passing trend.
The classic profile works on a modest bungalow or a new build, and it ages into the neighborhood instead of looking dated by decade three.
Low maintenance seals the deal for anyone who would rather spend weekends on projects they choose than on scraping and repainting.
Modern materials need little beyond occasional washing, and the upfront investment tends to return itself in both daily enjoyment and eventual resale.
Tools and Measurements That Matter
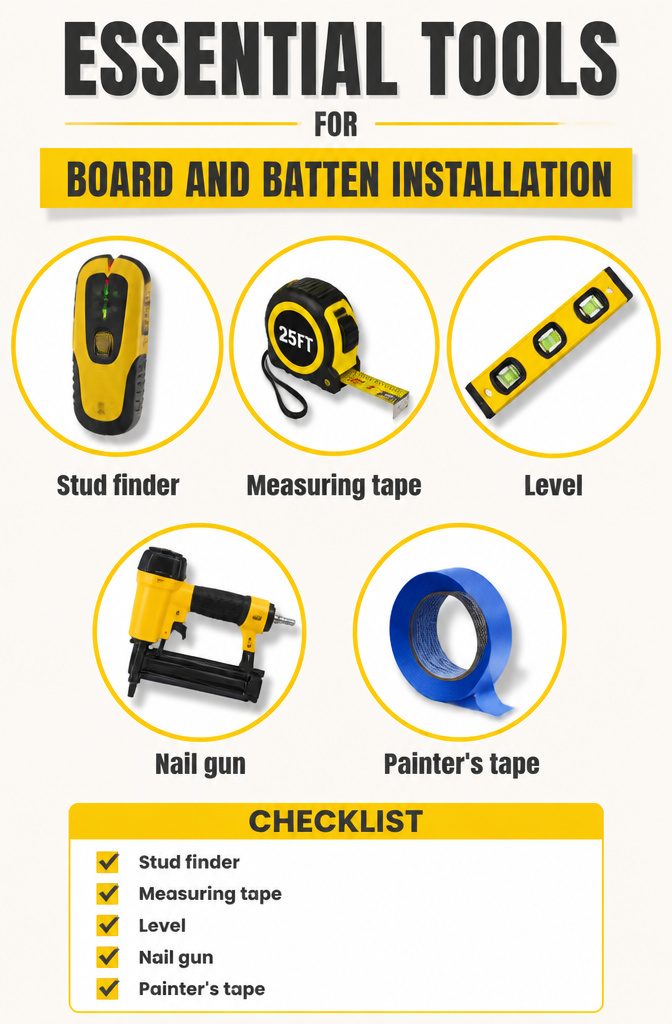
A stud finder keeps the battens from relying on adhesive alone, especially once paint adds weight and seasonal shifts start working the joints.
The one in my hand beeped at false positives for old plaster lath more than once, so I cross-check by rapping the wall and looking for the fastener line in baseboard corners before I commit.
The spacing you settle on matters more than the exact number. Sources ran 12" to 20" between battens; the wider end reads calmer in rooms already busy with doors and windows, while tighter spacing tightens the whole wall visually.
Painter’s tape on the wall beats math on paper for seeing which your eye accepts before you buy a single board.
For tools, three earn their keep fast:
- A measuring tape for marking each batten length individually; ceiling and floor are rarely parallel enough for one repeated cut
- A level, checked against the tape line, because the eye catches a tilted batten before it catches a tilted horizontal board
- A nail gun with nails long enough to hit stud when you find one; construction adhesive or liquid nails behind the batten fills where the stud misses
Frequently Asked Questions
What is board and batten siding?
Board and batten siding is a vertical wall treatment built from wide boards with narrow strips, called battens, fastened over the seams between them.
The boards run vertically, and the battens hide the gaps while adding the rhythm that makes the style recognizable.
It originated in Nordic Europe and came to American homesteads around the mid-19th century, where farmers and builders used it for barns and houses.
How much does board and batten cost?
Professional installation of board and batten siding runs between $10.50 and $13.90 per square foot, materials included.
For a 2,000 square foot house, that totals roughly $21,000 to $27,800. Costs have climbed about 10 percent annually for several years due to rising popularity.
How much does it cost to board and batten a 2000 sq ft house?
Installing board and batten siding on a 2,000 square foot house costs between $21,000 and $27,800 for professional installation with materials.
That figure comes from the $10.50 to $13.90 per square foot range reported by multiple cost estimates. Ordering materials sooner rather than later helps, since prices have been rising about 10 percent each year.
What materials can be used for board and batten?
Wood, fiber cement, vinyl, and engineered wood are the main options.
Cedar, pine, and cypress carry the traditional look but need regular maintenance against moisture and insects. Fiber cement like Hardie Panel resists rot and warping but costs more upfront.
Vinyl sits at the budget end, lasting up to 25 years with minimal upkeep. Engineered wood such as LP SmartSide splits the difference, offering wood appearance with added rigidity and warranty protection against hail, rot, and termites.
How do you install board and batten siding?
Installation starts with removing baseboard and trim, then checking that the wall surface is smooth or covering textured drywall with a thin panel board.
Next, attach level horizontal boards at top and bottom, screwing into studs. Cut vertical boards to fit between these horizontals, spacing them 12 to 20 inches apart, then nail battens over every seam.
Caulk all gaps, fill nail holes, and paint last. The battens must be wide enough to cover future wood shrinkage, and each batten gets one nail dead center into the seam crease so boards can move underneath.
What are the disadvantages of board and batten?
Wood versions demand the most maintenance, especially in humid climates or freeze-thaw zones where moisture damage and termites are risks.
Vinyl reads as manufactured up close and maxes out around 25 years. Fiber cement costs more upfront than some alternatives.
The style has also grown expensive as popularity has pushed material costs up roughly 10 percent yearly. For DIY interior projects, textured walls require extra prep work, and walls that are not level force individual measurements on every cut.
Is board and batten cheaper than siding?
Board and batten is a type of siding, so the comparison depends on which alternative you have in mind. Vinyl board and batten sits at the low end of the price range and installs quickly enough for weekend projects.
Fiber cement board and batten costs more than vinyl but less than traditional wood over its lifetime because maintenance needs drop.
Wood board and batten typically runs higher in total cost than horizontal vinyl siding once sealing, repair, and eventual replacement are factored in.