You can lay a finished LVP floor in one weekend for $400 to $1,500 if the subfloor is flat to 1/8 inch over 10 feet.
Most people skip the acclimation, cut it to 24 hours, and find gaps by February. The planks need 48 to 72 hours in the room, boxes open, at the temperature and humidity they will actually live in.
[link-whisper-related-posts]1. Acclimate the Vinyl Planks
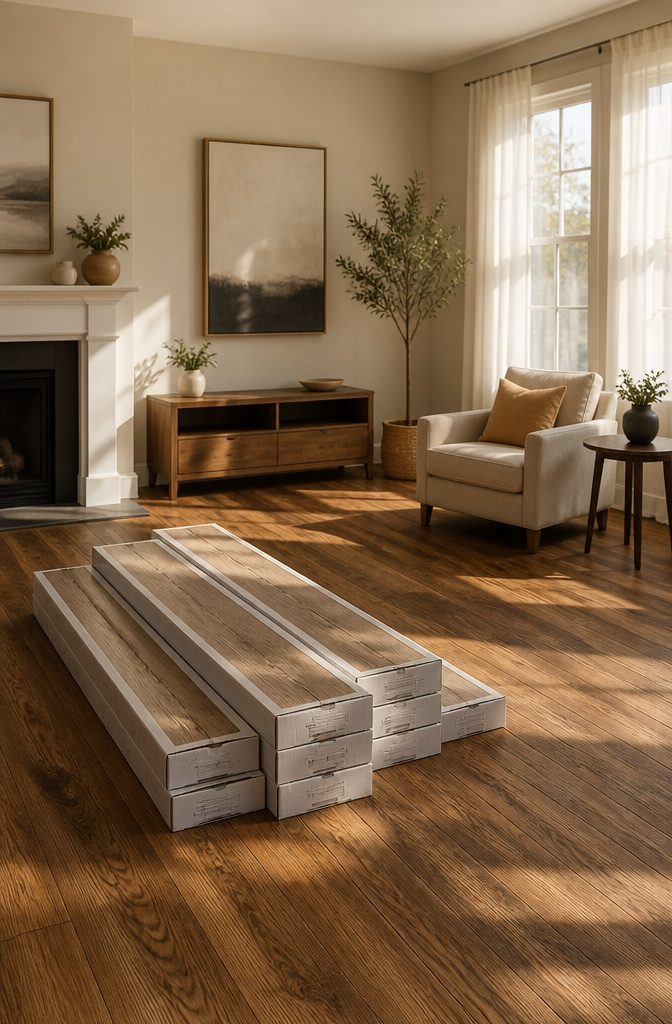
Vinyl expands when it heats up and contracts when it cools, which means the planks you carry home are not the same size they will be once they settle into your living room.
Leave them in that room for 24 to 72 hours before you touch a single one with a saw.
Most boxes list 24–48 hours as the minimum, but 72 is the safer bet if you have the weekend to spare.
Skipping this step or cutting it short is how you end up finding gaps between planks in February or watching edges buckle by July once the humidity climbs.
The acclimation is not extra credit; it is the step that keeps the floor you install on Saturday from looking like a mistake by spring.
Open the boxes so air can move across the planks, and let them sit at the temperature and humidity level the room actually holds during normal life, not while the windows are cracked for painting.
Let the material settle into the conditions it will live in, not the ones it left at the store.
2. Remove Baseboards
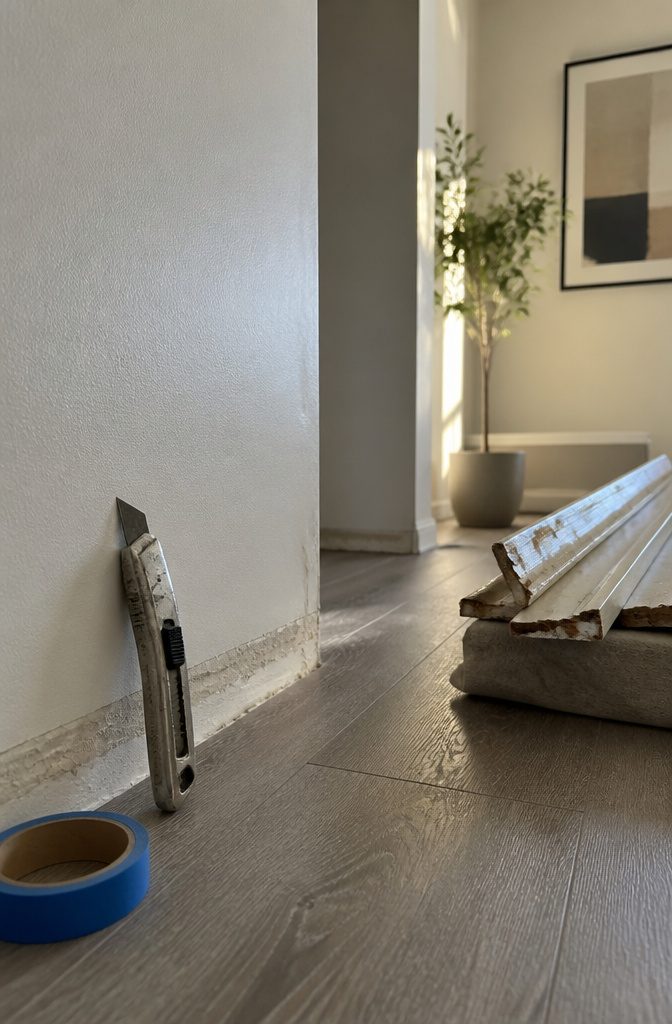
Baseboards have to come off if you want the clean edge that hides your expansion gap. Leave baseboards in place and you will spend twice as long notching planks around door casings with a jigsaw.
The actual removal is straightforward once you cut the seal. Run a utility knife along the top edge of each baseboard where paint or caulk meets the wall.
This breaks the bond so the board pulls free without taking drywall paper with it. Then slide a thin pry bar behind the baseboard, starting at a stud location where the nails sit, and lever it outward gently.
Work your way along the wall in six- to eight-inch increments; prying too aggressively at one spot snaps the board or punches through its face.
Label each piece on the back as it comes off: kitchen north wall, left to right. Reinstallation covers the required expansion gap at the perimeter, so precision here matters less than preserving the boards themselves.
If the nails stay in the wall, pull them or hammer them flush so they do not catch your new flooring as you slide planks into place.
3. Prepare the Subfloor
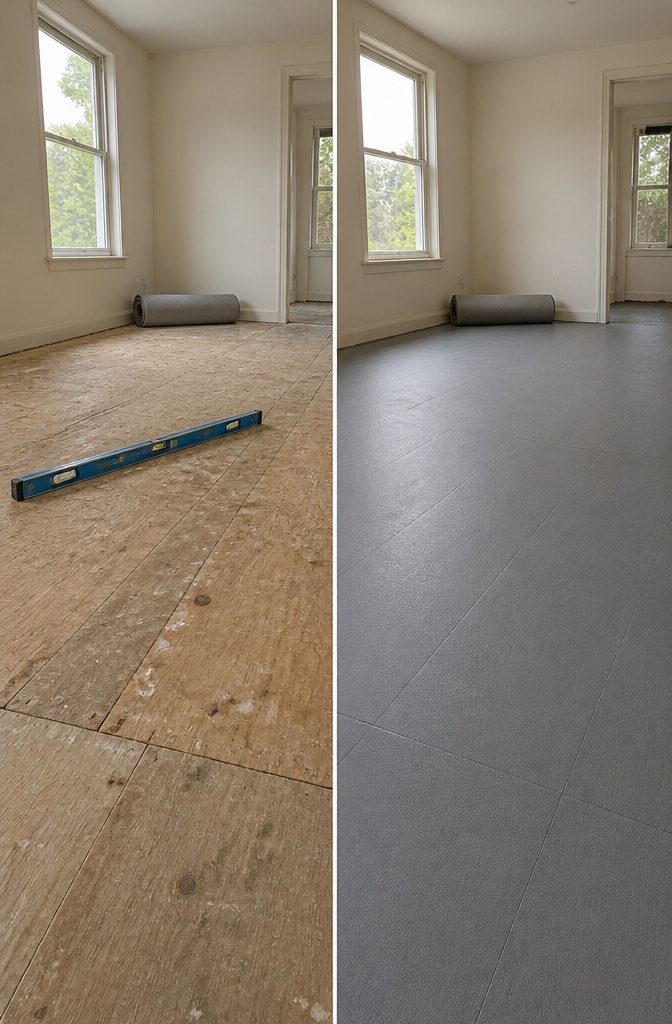
The subfloor decides whether your LVP looks finished or looks like a mistake six months in.
A floor must be flat to 1/8 inch over 10 feet; level is nice, but flat is the actual requirement, and most first-timers learn this the hard way.
Start by pulling up whatever is down there.
Carpet and pad come out, obviously. If you are floating the planks, tile or hardwood or one layer of vinyl can stay, but only if the surface underneath it meets that flatness standard.
Run a long level or a straight 2×4 across every direction of the room.
Low spots get filled with floor patching compound or a self-leveler; high spots on wood or concrete get sanded or ground down. Do not sand existing vinyl, it just melts into the abrasive.
Sweep and vacuum until the surface is actually clean, not "looks clean."
Dust and grit left behind telegraph through flexible planks or wreck the bond on glue-down jobs. Walk the floor with a hammer and pound every fastener flush.
A single screw head you missed becomes a click you hear every night. I have gone back over a room twice and still found another staple on the third pass.
The manufacturers print this standard for a reason.
Skip it, and the planks rock, separate, or squeak where they bridge a hump. That repair costs a second Saturday and a box of material you did not budget.
4. Install Underlayment
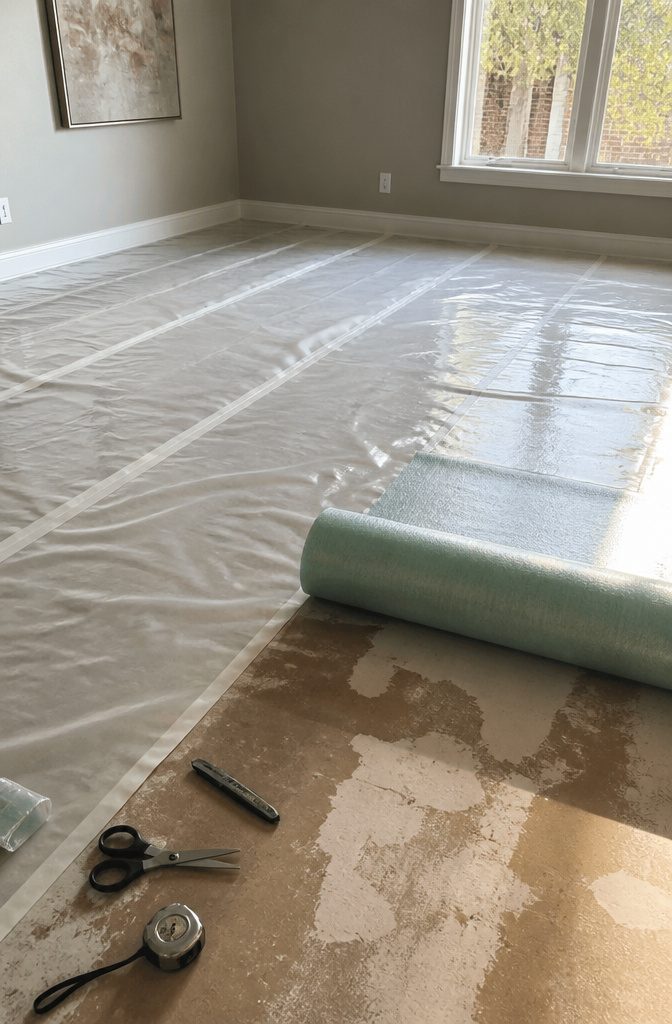
Most LVP sold now comes with a thin underlayment already attached to the back, but that layer does not handle moisture coming up from below.
Over concrete, you still need a separate vapor barrier between the slab and the plank, or the warranty may void and the floor can trap humidity underneath.
In my own reading, the split runs like this: if your planks have attached padding, roll the barrier first, then lay the planks directly on top.
If the planks are bare on the back, use a combined underlayment with vapor protection built in.
Either way, run the material perpendicular to your plank direction, butt the seams rather than overlapping them, and tape with joining tape. Overlapping creates ridges that telegraph through vinyl and leave the surface uneven underfoot.
Humid climates and below-grade spaces like basements are where this step pays off most.
Some newer slabs already have a vapor barrier cast beneath them, but you only find that out by breaking concrete or checking build records. Assume yours does not, and lay the protection.
5. Plan the Layout
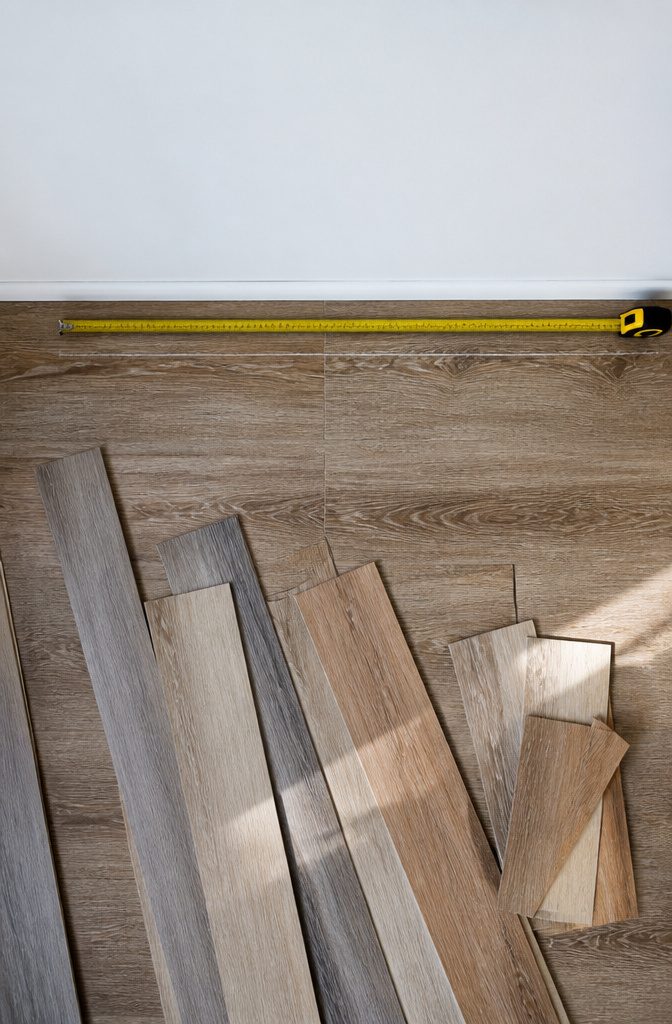
I measure every room the same way now, after the time I ended up with a 1-inch sliver of plank running the entire length of a hallway.
The tape measure goes wall to wall, then I do the math with the actual plank width, expansion gaps included.
A last row under a third of a plank’s width means cutting the first row down so you bookend with even rows. The 1/4-inch gap around the perimeter handles most rooms; anything wider or longer than 50 feet needs 1/2 inch instead.
Walls bow.
They always bow. I snap a chalk line 5/16 inch out from the starting wall so the first row has something true to follow, spacers handling the gap itself.
Alcoves and bump-outs get measured separately, since a narrow strip wrapping into a nook looks worse than a narrow strip on a straight run.
The calculation takes five minutes. Fixing a bad layout takes a Saturday you already promised to something else.
6. Cut the Vinyl Planks
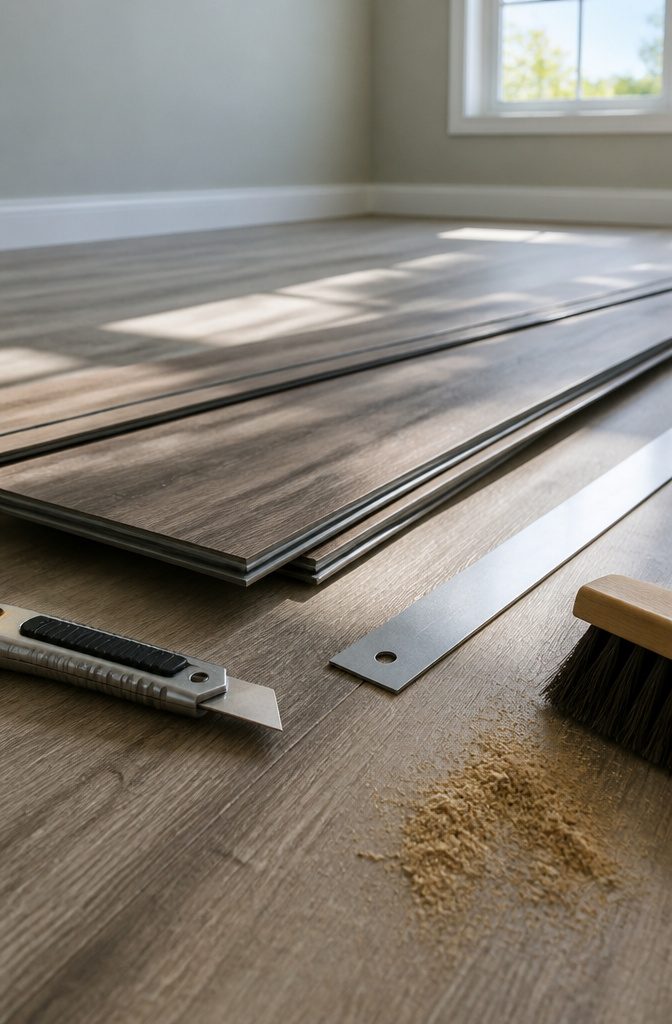
Most cuts in LVP are simpler than they look. A utility knife scores and snaps the plank clean for the majority of cuts, and that’s the tool to reach for first.
Score the wear layer with a straightedge, bend the plank back, and it breaks along the line with a crisp edge that fits tight against the wall.
For notches or irregular cuts around door jambs, a jigsaw with a fine-toothed blade does the work a knife can’t. A vinyl plank cutter is cleaner and faster if you have one, but it isn’t necessary for a weekend job.
Every plank that meets a wall needs that expansion gap. The standard is 1/4 inch, bumped to 1/2 inch if the room runs longer or wider than 50 feet.
I set spacers as I cut each piece rather than eyeballing it later; the gap disappears under baseboard, but the floor needs room to move when humidity swings.
7. Install the First Row
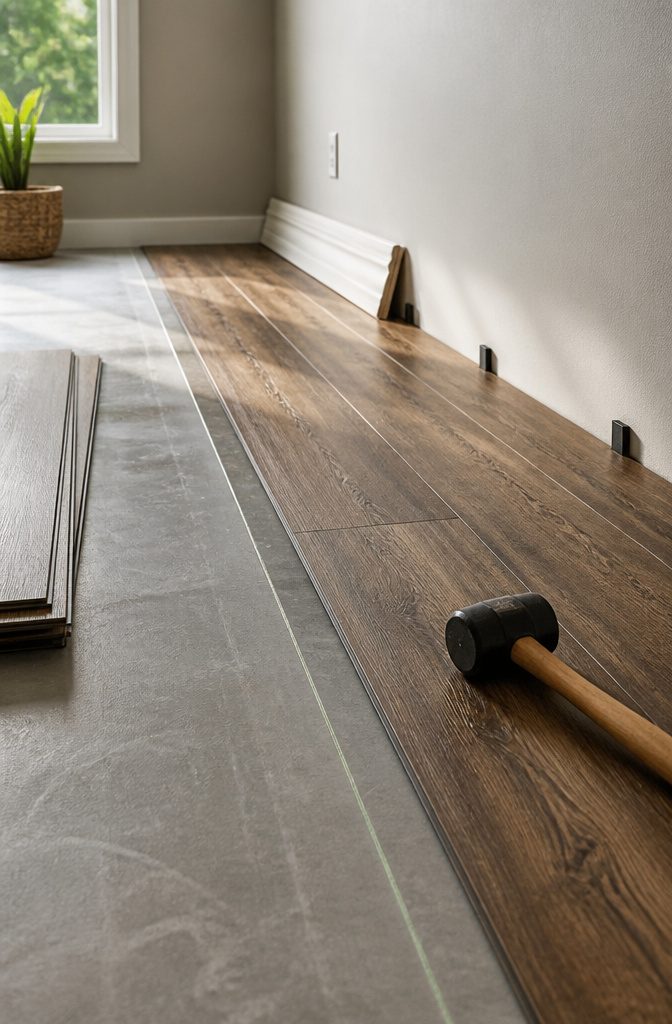
The first row of LVP is where the whole floor lives or dies. I snapped a chalk line 5/16 inch out from the starting wall, since spacers handle the expansion gap but that line catches any bow in the drywall.
With the groove edge facing away from the wall and the tongue toward it, I pressed the first plank to the spacers and locked the next one in short-end first, dropping the long side into the groove.
The cutoff from the last plank of a row starts the next one, which randomizes the stagger without measuring.
Most manufacturers want joints staggered at least six to eight inches apart, though some push that to eight; check the carton before you commit.
A dead blow mallet and a scrap plank as a tapping block drew the seams tight, and a pull bar saved the end piece where the mallet could not reach.
8. Continue with Subsequent Rows
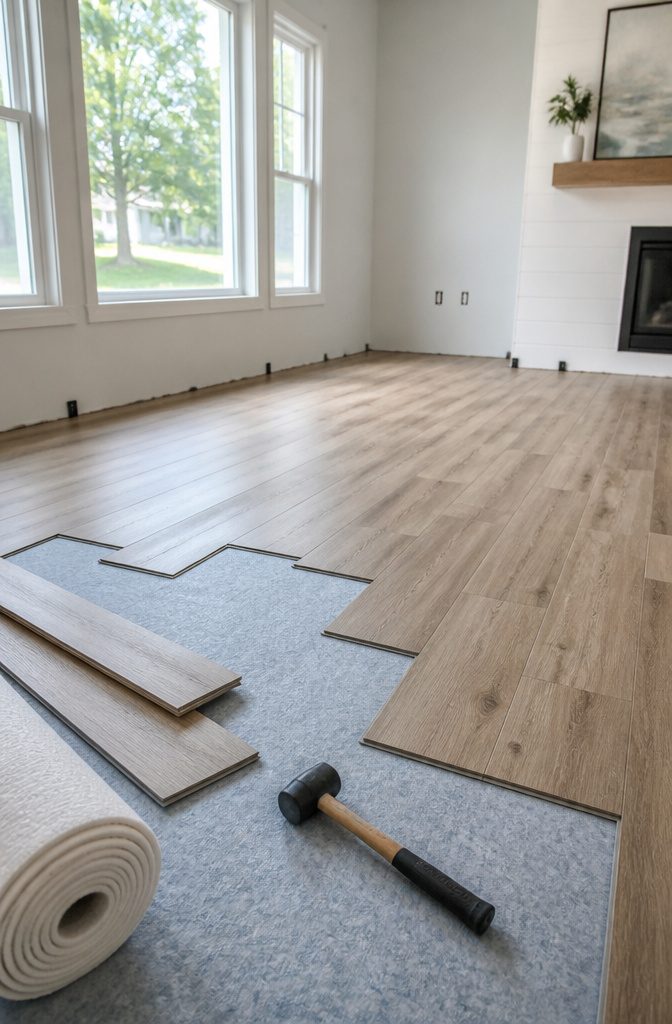
The cutoff from the previous row usually becomes the starter for the next, which randomizes the pattern without any obvious stair-step look.
A minimum 6-inch stagger between end joints is standard, though some installers prefer 8 to 12 inches for a more scattered appearance. Either way, never start or end a row with a piece shorter than 6 inches against the wall.
Lock each plank by inserting the short-end tongue into the previous plank, then lowering the long side into the groove of the row before it.
A dead blow mallet with a scrap plank as a tapping block seats the seam without damaging the edge. For the final piece in a row where a mallet won’t fit, a pull bar draws the end together tight.
Every few rows, step back and sight down the installation.
Planks can drift parallel without feeling off in the moment, and catching it early saves pulling up half a room. Keep spacers at the walls; the expansion gap is easy to forget once the rhythm sets in.
9. Install Transition Strips
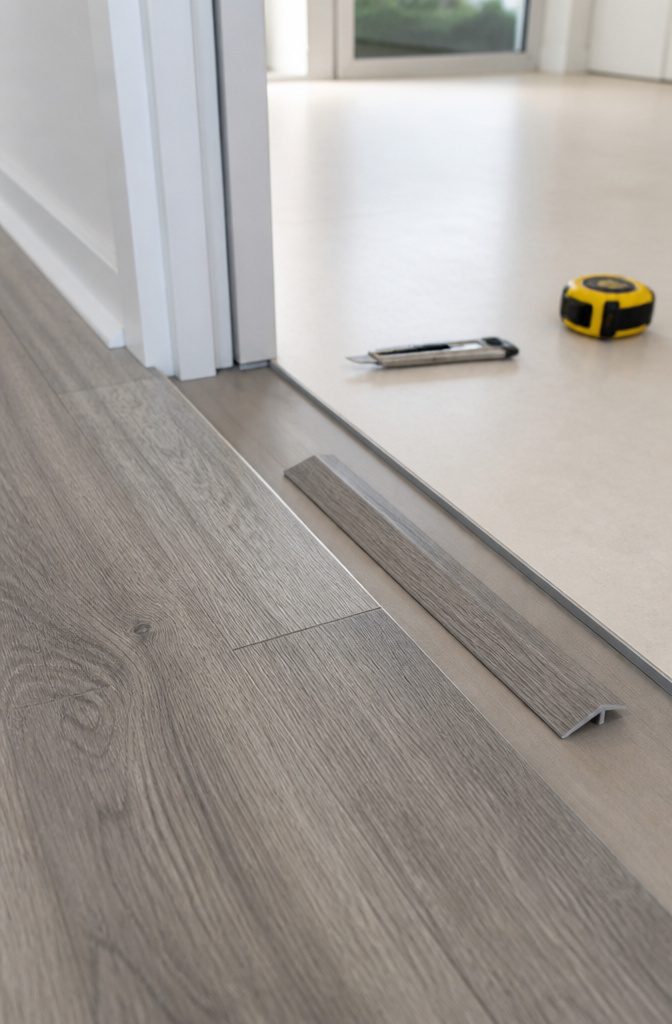
The gap between your new vinyl and whatever floor is already in the next room needs a cover, and that cover is where most weekend jobs go slightly wrong.
I learned to leave a 1/4-inch expansion gap between the vinyl edge and the transition strip itself, not just the wall gap everyone remembers.
The strip bridges the two floors, but it still has to float enough to let the vinyl move with seasons.
T-molding works when both floors sit level. A reducer handles the step down to thinner material, like if you’re coming out of a bedroom onto older tile.
For exterior doors, door thresholds seal the edge against weather. Most manufacturers sell strips dyed to match their planks, and the match is close enough that mixing brands looks off.
Measure jamb to jamb, not just the doorway opening, since the trim covers the ends.
A utility knife scores and snaps the vinyl or aluminum track, but hack through any metal rail inside with a hacksaw. Dry-fit the piece before you commit, because doorframes are rarely square and a 1/8-inch twist shows forever.
Attachment depends on the strip system.
Some screw to the subfloor through the gap, some glue with silicone adhesive, some snap over a hidden rail. The snap-in ones forgive a slightly bowed cut; the screwed ones do not.
10. Reinstall Baseboards
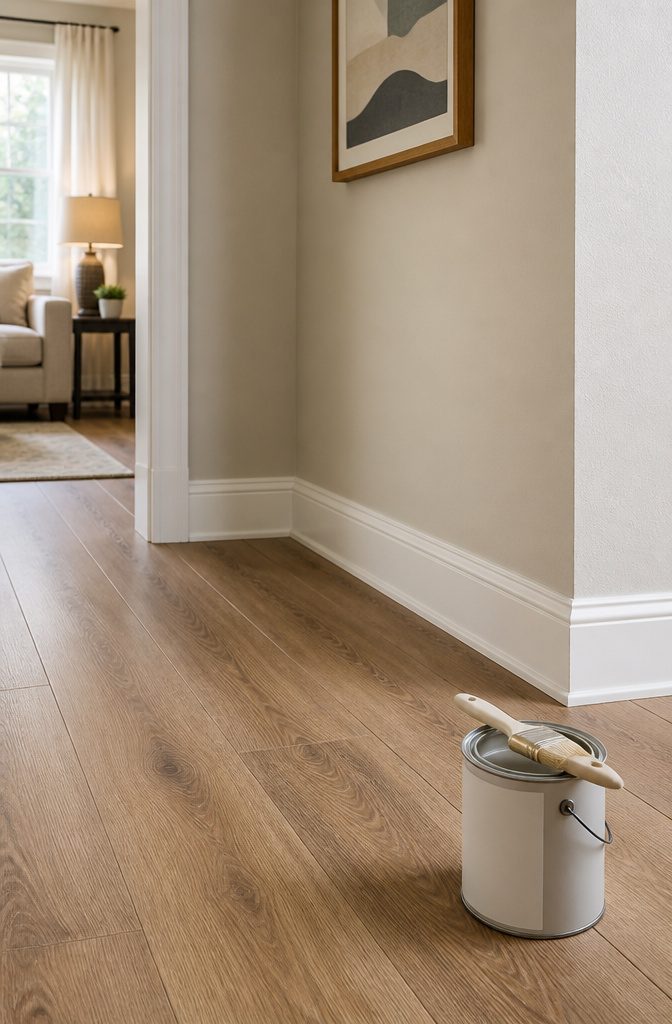
The baseboards went back up with finishing nails once the floor was down, and quarter round or shoe molding covers whatever gap remains if the old trim sits a little short.
I have reused baseboards that came off clean more than once; pry gently so the nails back out without splitting the wood.
If the new floor height leaves a visible sliver of wall, shoe molding sits tighter to the baseboard than quarter round and reads as one piece of trim.
Family Handyman notes that shoe molding gets nailed into the base trim every 16 to 20 inches with 1-1/4-inch brads, not into the flooring, so the planks still float.
Set the nails, fill the holes, and paint the molding to match the trim rather than the floor.
Skipping this step and leaving the gap open is the kind of shortcut that looks fine on day one and gathers dust and regret by month three.
11. Final Touches
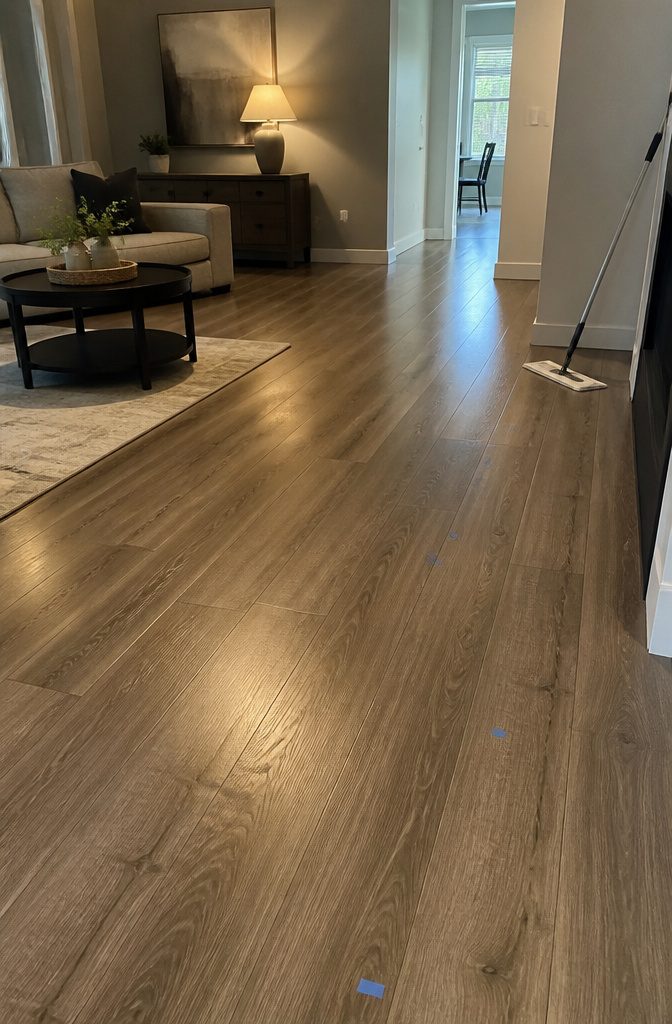
The last plank clicked in around dinner time, and the room looked finished under the overhead light.
That light lies. A flashlight held at ankle height will show every gap the overhead missed, every corner where the plank didn’t quite seat against its neighbor.
I walked the whole room that way, marking three spots with blue tape for a second pass with the mallet and block.
Debris hides too. The sawdust that sat under the planks while you worked will migrate to the seams over the next day, and a dry microfiber mop run across the surface picks up what the broom left.
I waited until morning to move anything back.
Twenty-four hours lets the locking joints settle fully, and the floor feels different underfoot after that rest, more solid, less clicky. The temptation is to drag the couch in that same night.
I gave in once on an earlier project and spent the next month noticing the soft spot where a joint hadn’t fully seated. The furniture can wait.
Click-Lock, Glue-Down, and Self-Adhesive Methods
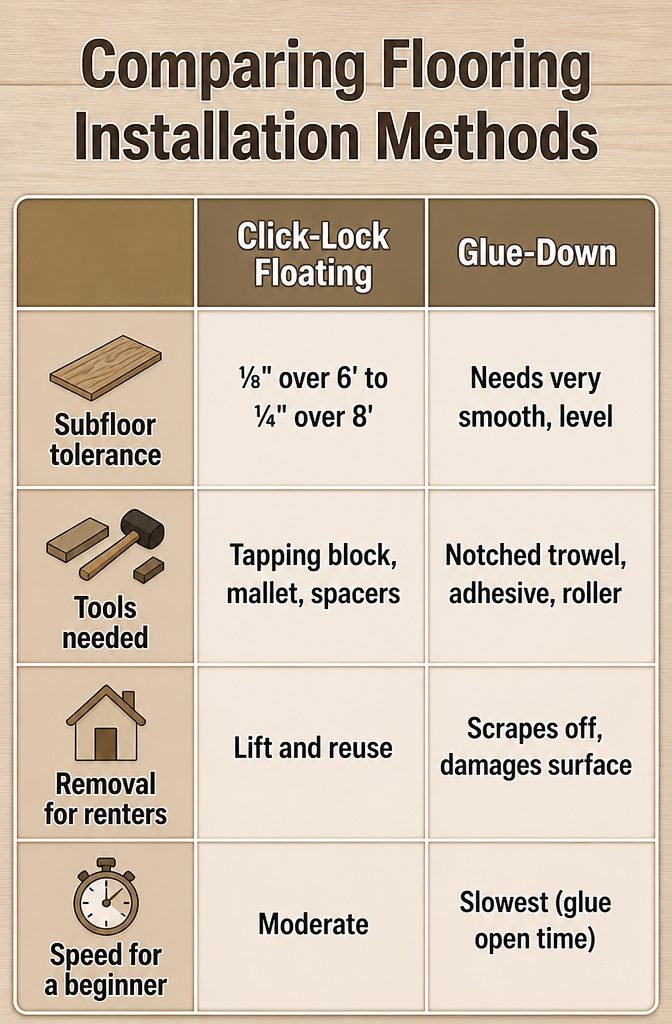
Click-lock, glue-down, and self-adhesive each solve a different subfloor problem, not a different skill level.
The floating click-lock system snaps together like puzzle pieces and sits on top of the subfloor without bonding to it, which makes it the forgiving choice for concrete, existing vinyl, or smooth plywood that has minor flaws.
Glue-down planks get troweled into place with adhesive that needs open time to go tacky, and the bond demands a subfloor flat enough that the seams won’t telegraph every bump.
Self-adhesive peels straight from the backing and presses down, fast but unforgiving: any debris or high spot becomes a permanent bubble because the glue grabs immediately.
| Click-Lock Floating | Glue-Down | Self-Adhesive | |
|---|---|---|---|
| Subfloor tolerance | ⅛" over 6′ to ¼" over 8′ | Needs very smooth, level | Needs very smooth, clean |
| Tools needed | Tapping block, mallet, spacers | Notched trowel, adhesive, roller | Hand roller, knife |
| Removal for renters | Lift and reuse | Scrapes off, damages surface | Scrapes off, damages surface |
| Speed for a beginner | Moderate | Slowest (glue open time) | Fastest |
I would skip self-adhesive in any room larger than a closet. The speed does not survive real-world dust or the slight waviness of a starter-home subfloor, and one trapped hair at the seam ruins the flat finish.
Glue-down earns its effort only where you need the lowest possible profile at door transitions or where the floor takes heavy rolling traffic.
For a weekend project with a few hundred dollars and ordinary tools, click-lock floating wins: the expansion gap hides at the baseboards, the locking mechanism forgives a subfloor that is merely "pretty flat," and you keep the option to pull it up when the lease ends or the next project calls.
Why Vinyl Plank Works for Rental and Starter Homes
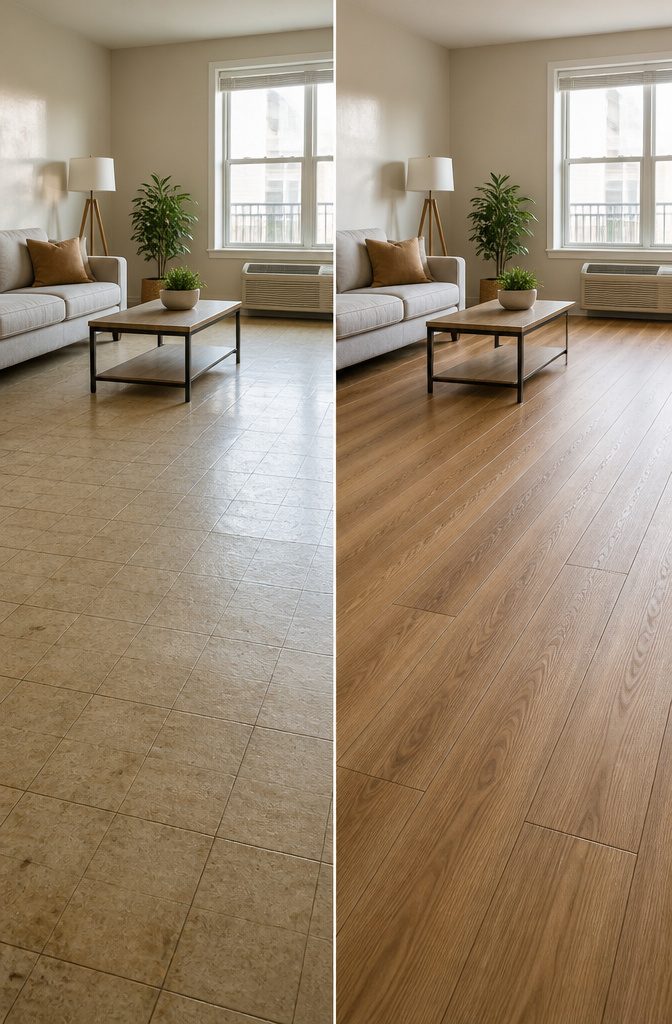
Luxury vinyl plank runs about $3 to $10 per square foot, which is the first thing that made me stop scrolling and start measuring my living room. Real hardwood was off the table.
So was stone. LVP gave me the look of both without the cost or the maintenance schedule.
The planks are either highly water-resistant or fully waterproof depending on the variety, which matters more than I expected once I thought about my kitchen and the bathroom down the hall.
Sweeping and occasional mopping is the whole routine. No refinishing, no sealing, no weekend spent on hands and knees with a buffer.
Durability sold me next.
These planks do not need to be replaced or refinished the way hardwood eventually does. For a starter home or a rental you might not stay in forever, that long-term savings matters even if the upfront price already looked reasonable.
What pushed me over was the floating floor design. The planks sit on top of the existing subfloor without adhesive or fasteners.
I could install it myself in a weekend, which meant no labor costs eating up the budget I had actually saved. That is how a $400 to $1,500 project stays a $400 to $1,500 project.
Tools and Materials I Actually Used
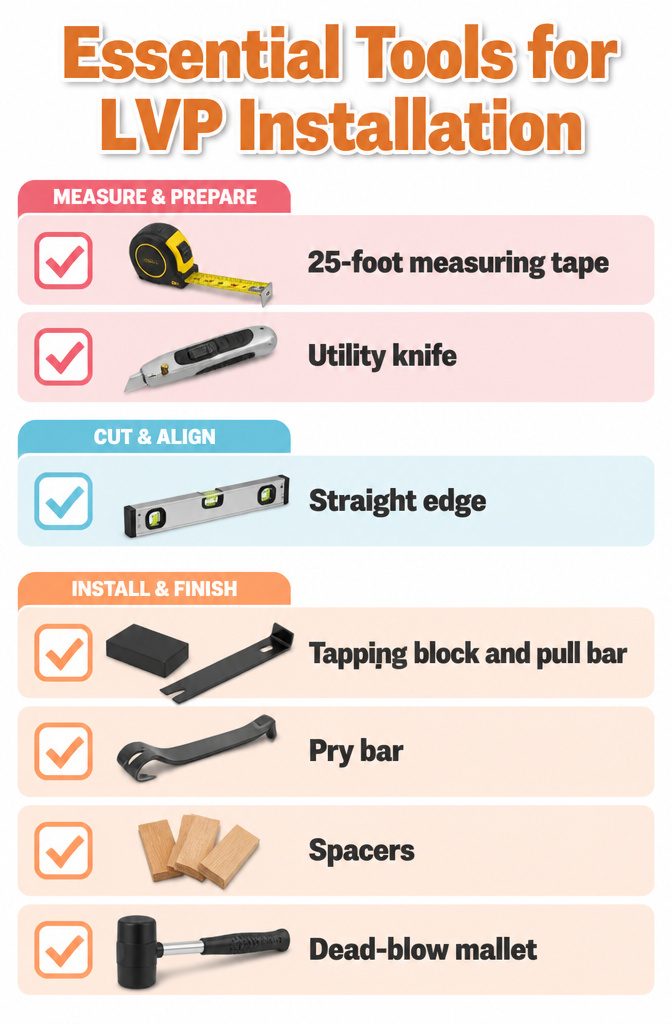
The right tools for installing LVP flooring come down to whether you’ll use the floor again or this is the only room you’re touching. Here’s what got me through the job:
- 25-foot measuring tape. A standard tape works, but the 25-foot length kept me from repositioning on every wall run in the living room and two bedrooms.
- Utility knife. This was my primary cutting tool. Score the plank’s wear layer, bend it back, and it snaps clean. I skipped the vinyl plank cutter and the guillotine-style options; the knife was slower on the last few cuts but cost nothing extra.
- Straight edge. A 6-foot level or a board you trust to be straight. I borrowed the level from a neighbor.
- Tapping block and pull bar. The tapping block knocks planks together along the long edge. The pull bar lives at the end of each row, hooked over the plank edge so you can tap the other end and draw the piece tight against the wall without a gap. One source mentions you can use a scrap piece of flooring as a tapping block if your vinyl is rigid enough; mine wasn’t, so the block stayed.
- Pry bar. Not for the LVP itself, but for whatever flooring came out first and for lifting baseboards without snapping them.
- Spacers. Quarter-inch to half-inch, depending on the manufacturer’s expansion gap spec. I cut mine from scrap plywood.
- Dead-blow mallet. Paired with the tapping block so you don’t mushroom the plank edge.
What I left at the store: the laser level, the oscillating multi-tool for door jambs, and the knee pads.
The floor was firm enough to work from a foam mat, and the door jambs in this house had enough clearance already.
Mistakes That Cost Me a Saturday
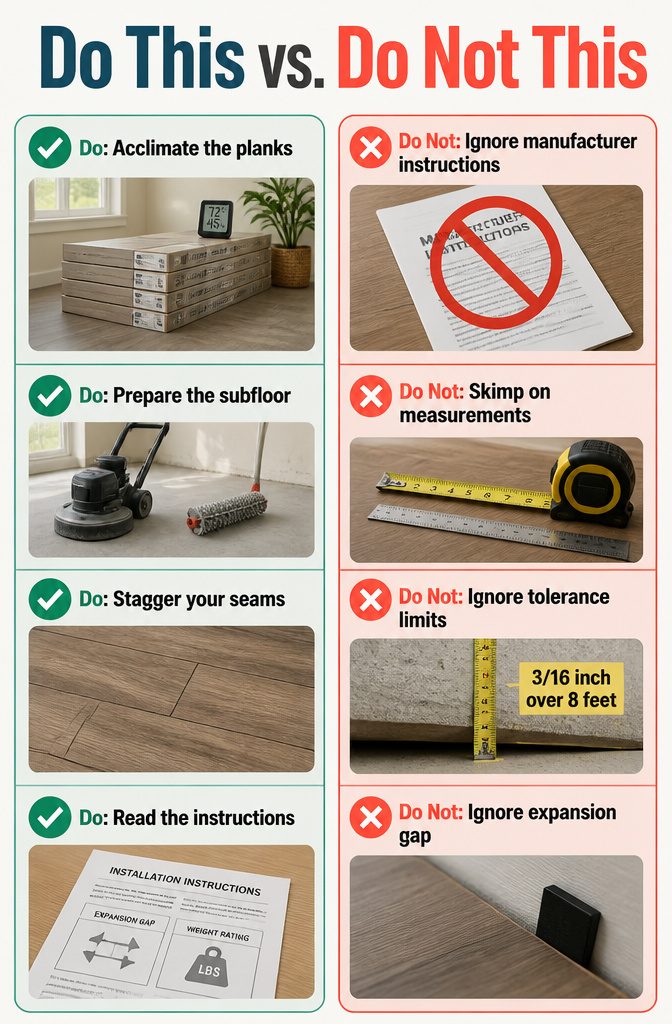
My first LVP install taught me that skipping acclimation cost me a full Saturday.
The planks cupped enough that the click-lock edges wouldn’t seat flat, and I spent six hours pulling up forty square feet to let the boxes sit in the room for the 48 hours the manufacturer asked for.
I had also ignored the subfloor prep because my concrete looked fine to the eye. After laying three rows, a hollow spot underfoot made the planks rock.
I ended up renting a grinder for high spots and pouring self-leveler on the low ones, which added another day and about eighty dollars. The manufacturer tolerance is usually 3/16 inch over 8 feet, and "close enough" isn’t.
The stagger was where pride got me. I wanted clean, even seams at the doorways and ended up with a joint running within six inches of another one three rows later.
Click-lock planks need at least six inches of offset, and the pattern should look random, not organized. I pulled those rows too.
The instructions matter.
Each brand sets its own expansion gap and weight rating, and ignoring either voids the warranty. I now read the sheet before I open the first box, even when I think I know the product.
Frequently Asked Questions
Can a beginner install vinyl plank flooring?
Yes, vinyl plank flooring is one of the easiest floors for a beginner to install.
The click-lock floating system snaps together without glue or fasteners, and you can lay it over existing subfloors with basic tools like a utility knife, tapping block, and mallet.
Most weekend DIYers can handle a room or two with no prior flooring experience.
Do you need to put anything under vinyl plank flooring?
It depends on the product. Most LVP sold now has thin underlayment attached to the back, but concrete subfloors still need a separate vapor barrier to block moisture from below.
If your planks have no attached padding, use a combined underlayment with built-in vapor protection instead.
How long before you can put furniture on vinyl plank flooring?
Wait at least 24 hours after the last plank goes down before moving furniture back.
The locking joints need that time to settle fully, and placing heavy items too soon can prevent proper seating. A joint that has not fully clicked into place will feel soft or clicky underfoot for months.
Should you put anything down before installing LVP flooring?
Over concrete, roll a vapor barrier first even if your planks have attached padding; otherwise the warranty may void and moisture can trap underneath.
On wood subfloors with attached-padding planks, nothing extra is needed. Bare-back planks need a combined underlayment with vapor protection built in.
What are common mistakes people make when installing vinyl plank flooring?
The most common mistakes are skipping acclimation, inadequate subfloor prep, leaving baseboards in place, and failing to stagger joints properly.
Rushing the installation, ignoring manufacturer instructions, and forgetting expansion gaps at walls and transitions also cause gaps, buckling, or loose planks down the road.
Is LVP flooring easy to install?
Yes, LVP is among the easiest flooring to install yourself.
The floating click-lock design requires no glue or nails, cuts with a utility knife, and forgives minor subfloor flaws. A typical living room takes one weekend with basic tools you may already own.
Does luxury vinyl flooring need to be glued down?
No, most LVP installs as a floating click-lock floor that sits on top of the subfloor without adhesive.
Glue-down is only necessary where you need the lowest possible profile at door transitions or under heavy rolling traffic. Self-adhesive planks exist but work best in small spaces like closets.