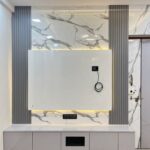
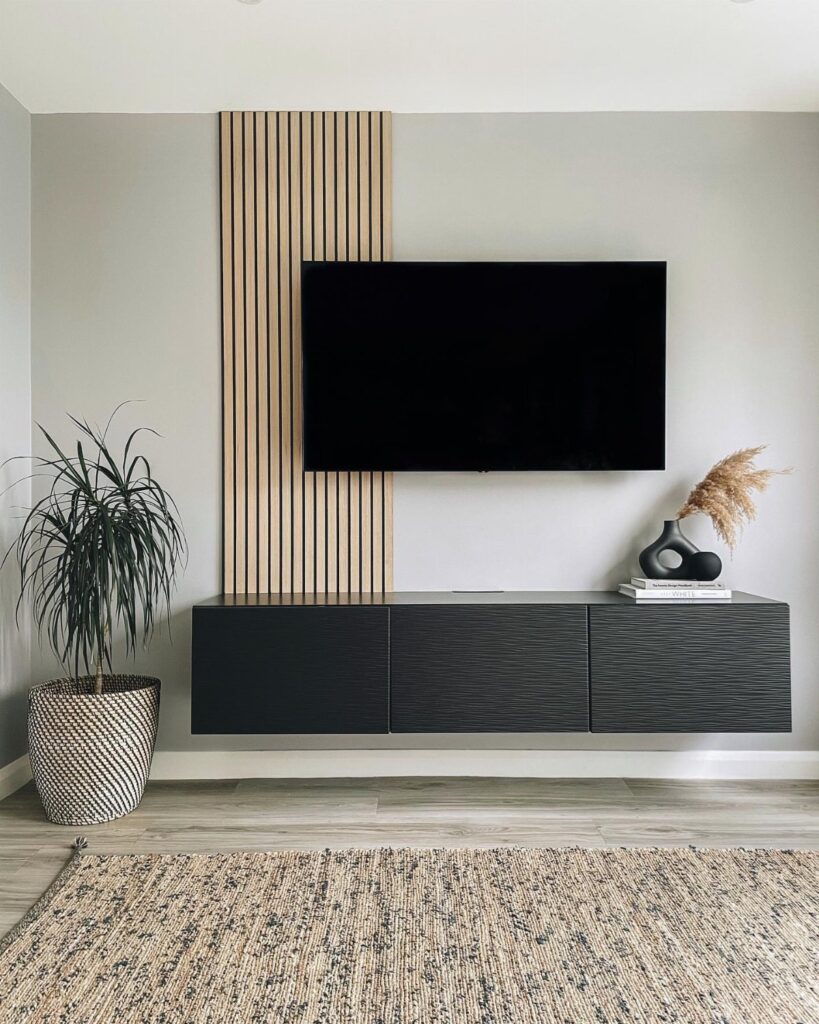
These wood wall designs run from peel-and-stick planks you can pull up again to custom millwork that needs a contractor, and the deciding factor is how permanent your situation is.
Renters get adhesive backing and panels that hang on cleats; owners can nail into studs and run LED channels behind plywood mountains.
The ½ inch spacing between bathroom slats is the kind of detail that separates a wall you live with from one you tolerate.
[link-whisper-related-posts]1. Weathered Wood Design
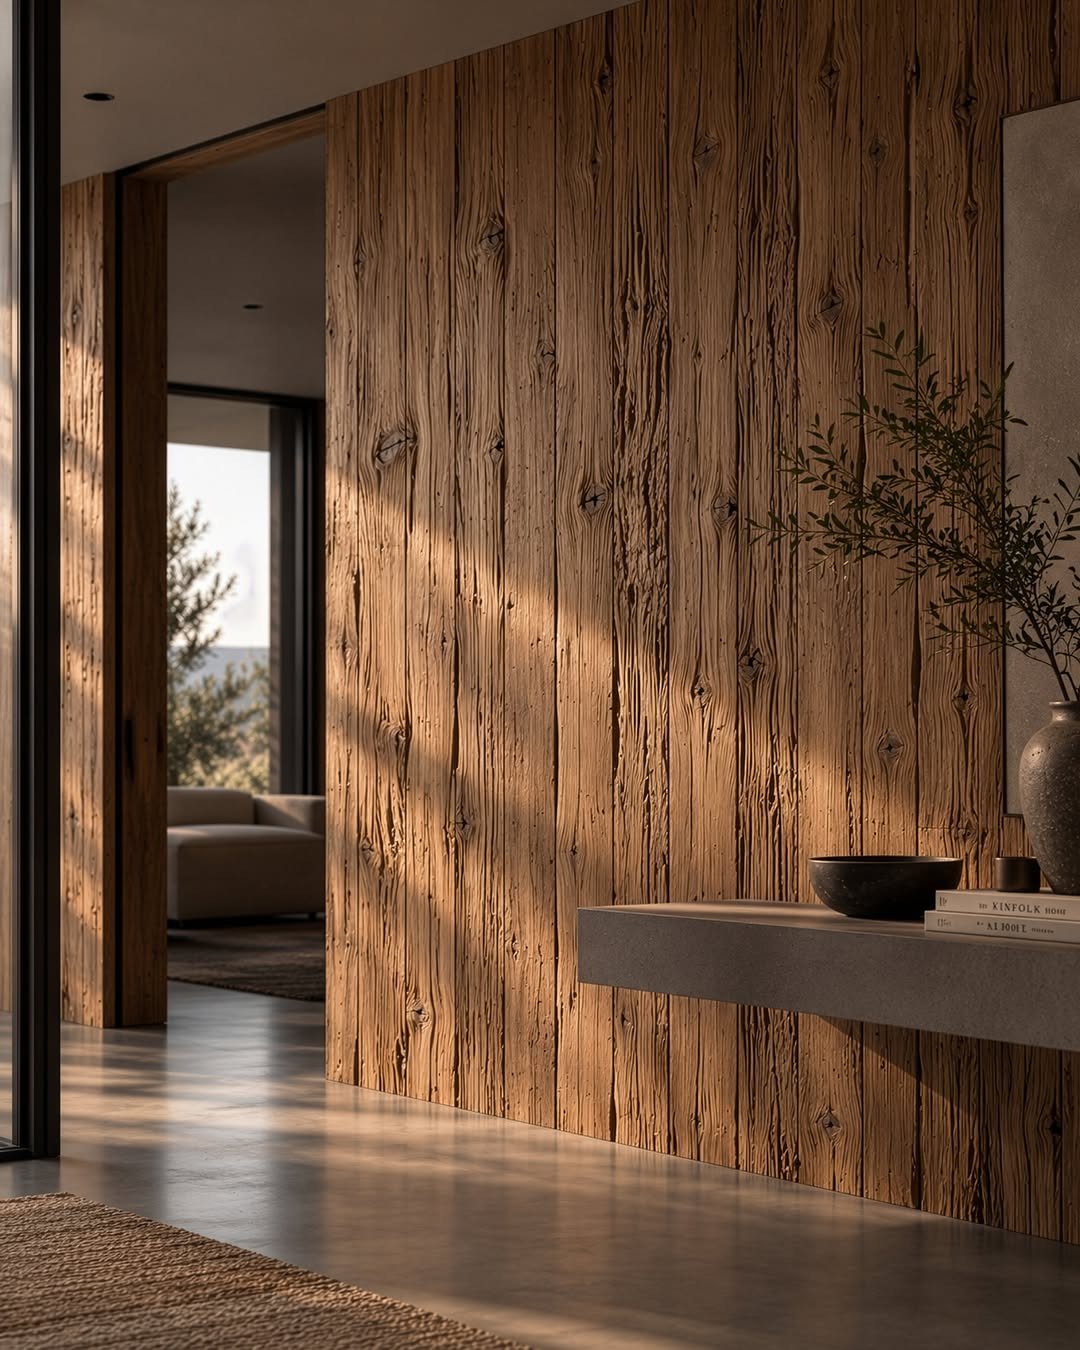
Reclaimed barn wood gives a wall the kind of history you cannot fake.
Rough texture and varied tones work in entryways where you want warmth without clutter, and a vertical install keeps the grain running eye-height so the space feels taller than it is.
Real reclaimed lumber costs more if you source it yourself; faux panels cut that roughly in half and skip the nail-pulling.
I would go real only if you have a local demolition yard and a free weekend to clean the boards.
The rough surface hides scuffs, which makes this forgiving for high-traffic spots. Pair it with something smooth and modern, like a concrete shelf, or it tips into cabin cliché.
AD PRO Directory member Jeff Andrews, the founder of Jeff Andrews Design in Los Angeles, appreciates how natural wood patina gives walls “an organic quality that can’t be recreated with new or painted wood.”
2. Minimalist Wood Paneling
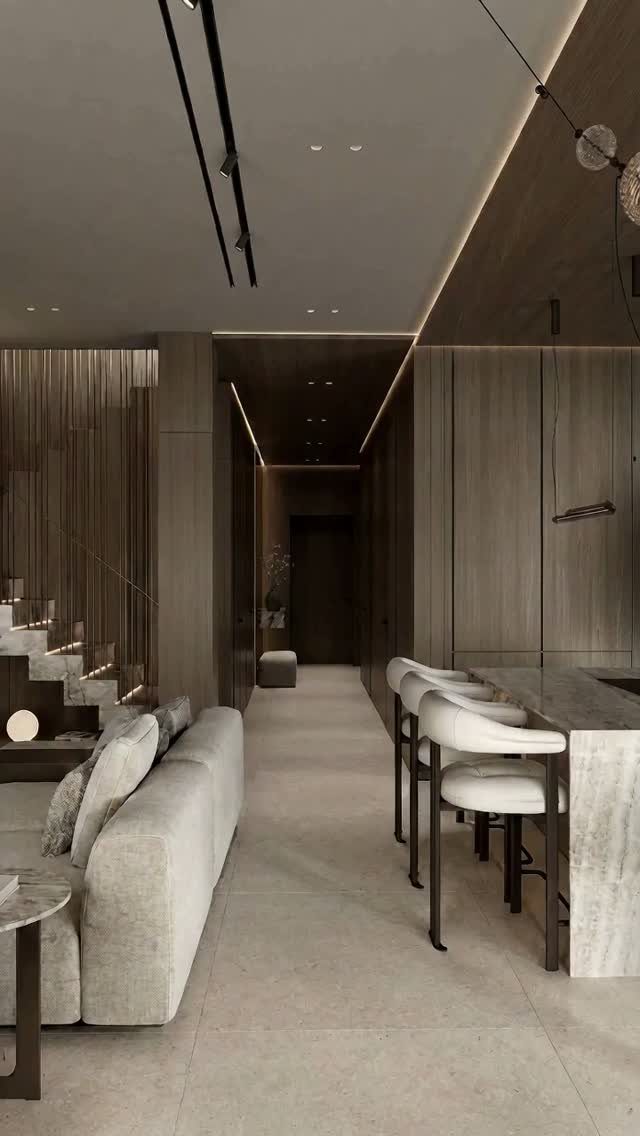
Floor-to-ceiling wood paneling reads as architecture, not decoration, when the grain runs continuous and the hardware disappears.
Designer Lauren Thomsen hid finger pulls inside the door gaps and ran crown molding flush to the ceiling; the result is a wall that stores things without looking like a cabinet.
Thermal-treated poplar handles moisture shifts better than standard lumber, so mudrooms and kitchens near exterior doors are fair game. The thermal process darkens the wood to a tone that reads as walnut-adjacent without the walnut price.
This needs a millworker or serious DIY patience; scribing trim to an uneven ceiling is where amateur jobs show.
For a rental, peel-and-stick wood veneer over existing flat doors gets you most of the look with a putty knife for removal.
3. Wood Accent Wall Design
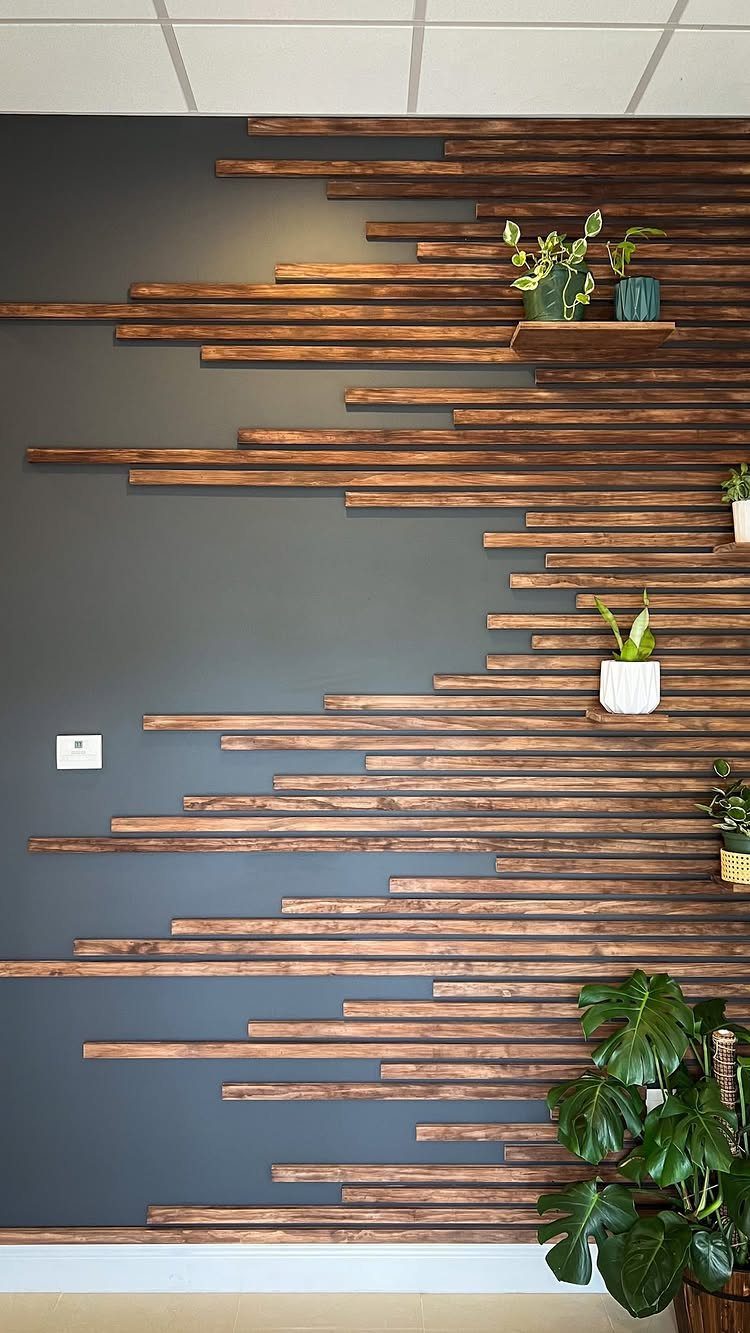
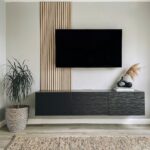
An accent wall lives or dies on whether it actually accents something. The staggered horizontal slats here do, because they break the plane of a flat wall without demanding the whole room follow their lead.
Engineered flooring works vertically better than solid wood; it expands and contracts less, so your gaps stay consistent through heating seasons.
Designer Hillary Cohen used lightly brushed oak with consistent grain for a refined effect, but the same technique in a darker or more varied wood shifts the mood toward lodge.
Slats double as shallow shelves for small plants, which turns the wall into living texture. Check your studs before you buy lumber; slats this thin need anchor points at standard stud spacing or they bow.
4. 3D Textured Panels
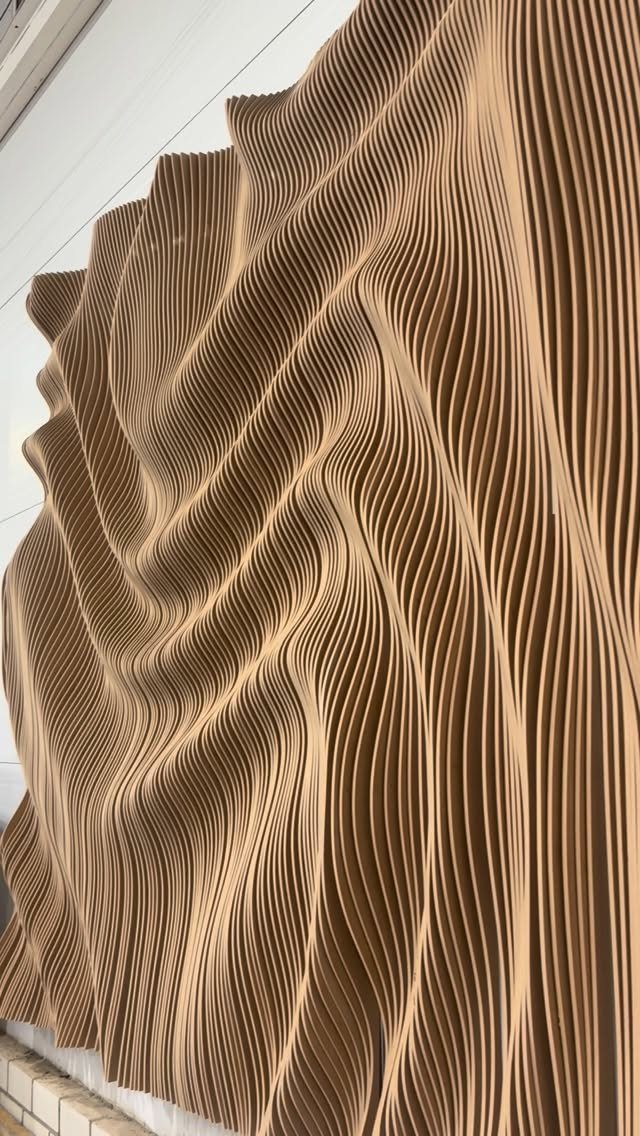
Light grazing across carved wood creates shadows that move through the day, which is why 3D panels work. The wave pattern here throws stripes of shade that read as motion even when nothing in the room changes.
These install like tile over a flat substrate; the panels themselves are the finish, so you are not adding structure, just surface. Cost runs toward the custom end, and the effect depends entirely on your lighting.
A ceiling can washes it out; a side-mounted sconce or LED strip at the base turns the ridges into a slow ripple.
For a budget version, rip pine boards to varying widths on a table saw and stack them with offset edges. The texture is rougher, the shadows sharper, and the whole thing costs lumber plus a Saturday.
5. Wood Slat Walls
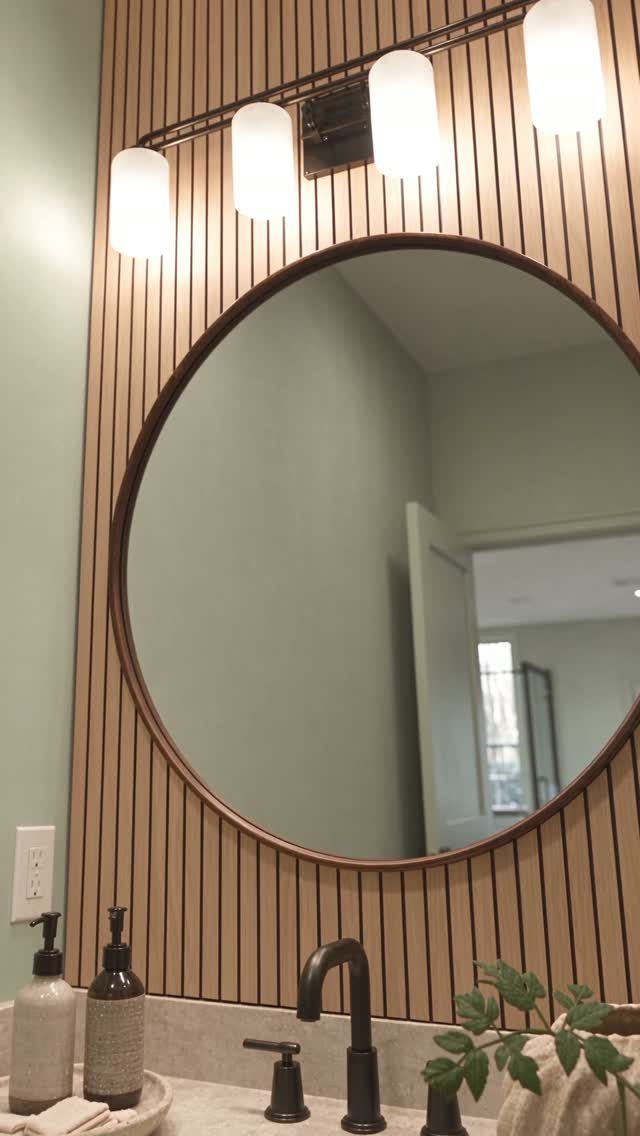
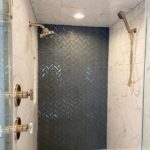
Vertical slats behind a bathroom mirror add texture where tile would read cold. The spacing matters more than the wood species; ½ inch between slats catches light without becoming a dust trap, and ¾ inch starts to look like a fence.
Kristen Peña used slats behind a bed to soften brass and antique mirror, which tells you where this belongs: anywhere the materials risk feeling too polished. The natural variation in wood grain breaks up reflective surfaces.
Spa-grade bath installs need marine oil or a hardwax finish; standard poly turns cloudy with steam over time. If you are renting, a single slat panel on French cleats removes in one piece when you move.
6. Wood Planters and Shelves
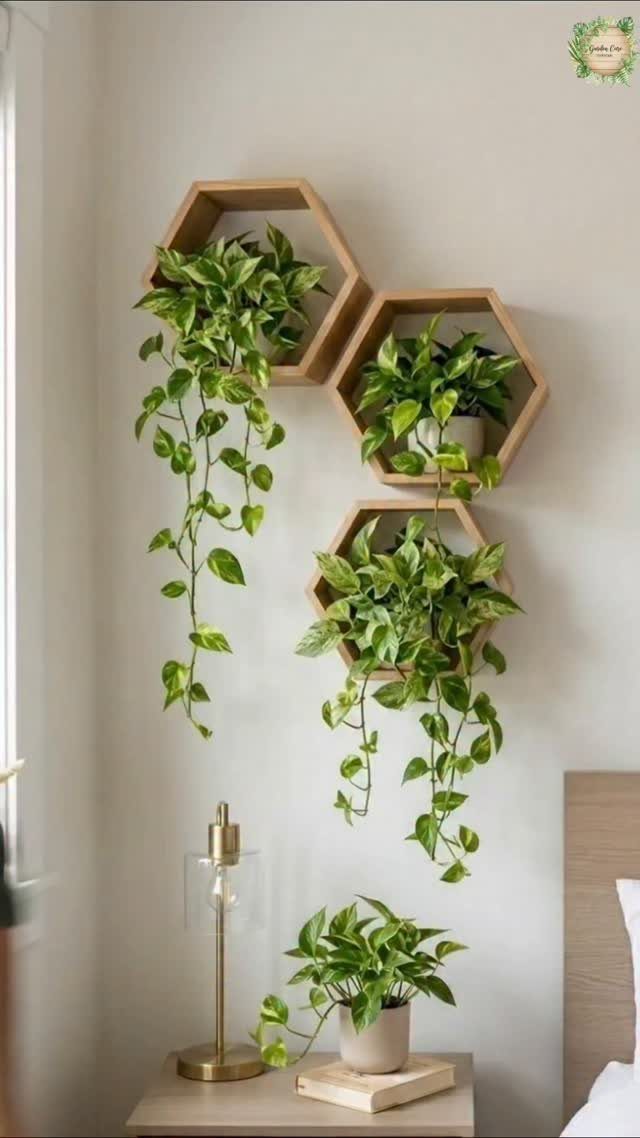
Hexagonal shelves turn wall storage into geometry; the shape matters because it tessellates, letting you cluster or scatter without the ragged edges squares leave. The plants here trail downward, which softens the angles.
These mount on keyhole brackets hidden behind the back face, so the wall shows nothing but shadow lines.
Weight limits depend on your anchors; a hex shelf full of wet soil runs heavier than books, so hit studs or use toggle bolts rated heavy enough for the load.
For a variation, run a single live-edge shelf across 3 hexes instead of separate units. The organic edge fights the geometry just enough to keep the wall from feeling too calculated.
7. Horizontal Wood Plank Wall
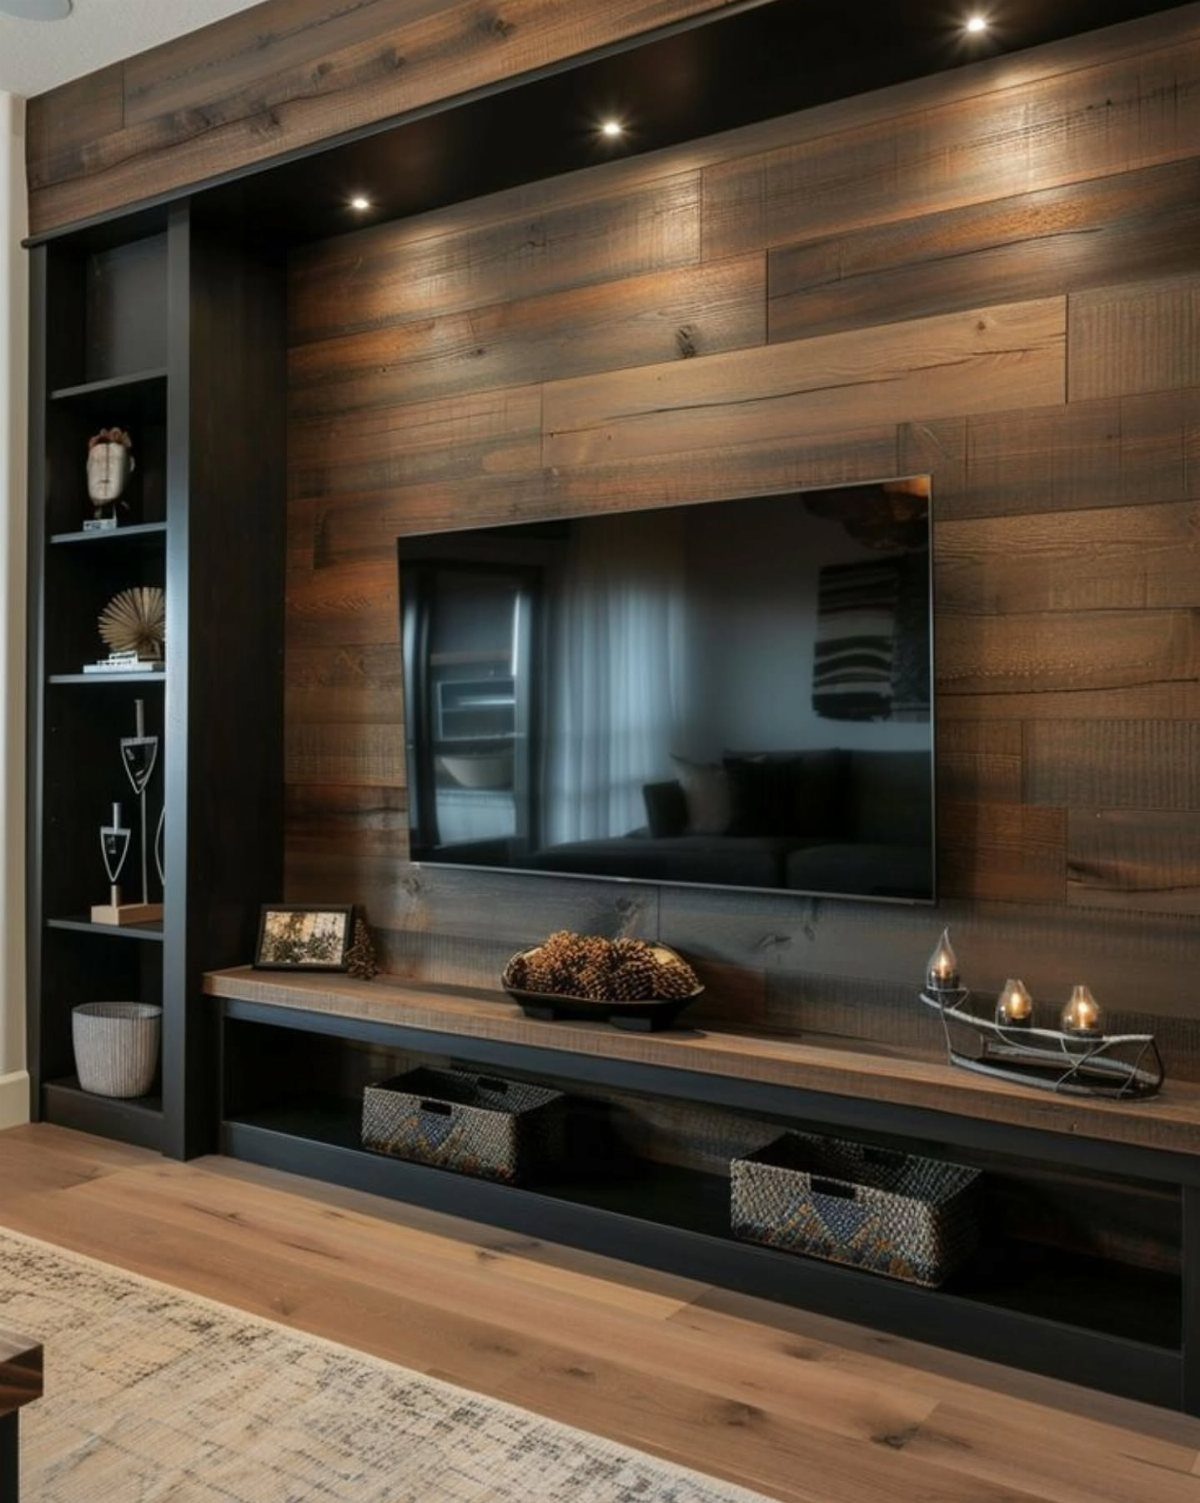
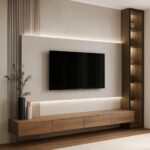
Horizontal planks pull the eye wider, which helps in a narrow living room where the TV already locks your attention to one wall.
Dark tones in varied browns hide scuffs better than a single stain color, and the random widths keep it from looking like fencing.
Peel-and-stick backing exists now for real wood planks, not just vinyl prints. You clean the wall, start at one corner, and press each row level.
No nail gun, no patching drywall later. Ceiling height changes the look.
Lower ceilings give you fewer planks stacked together, which looks intentional, while taller ceilings stretch the proportions better.
I’d still rent a brad nailer for a permanent install. The adhesive works fine until summer humidity swells a plank and you find the gap in October.
8. Geometric Wood Inlay Wall
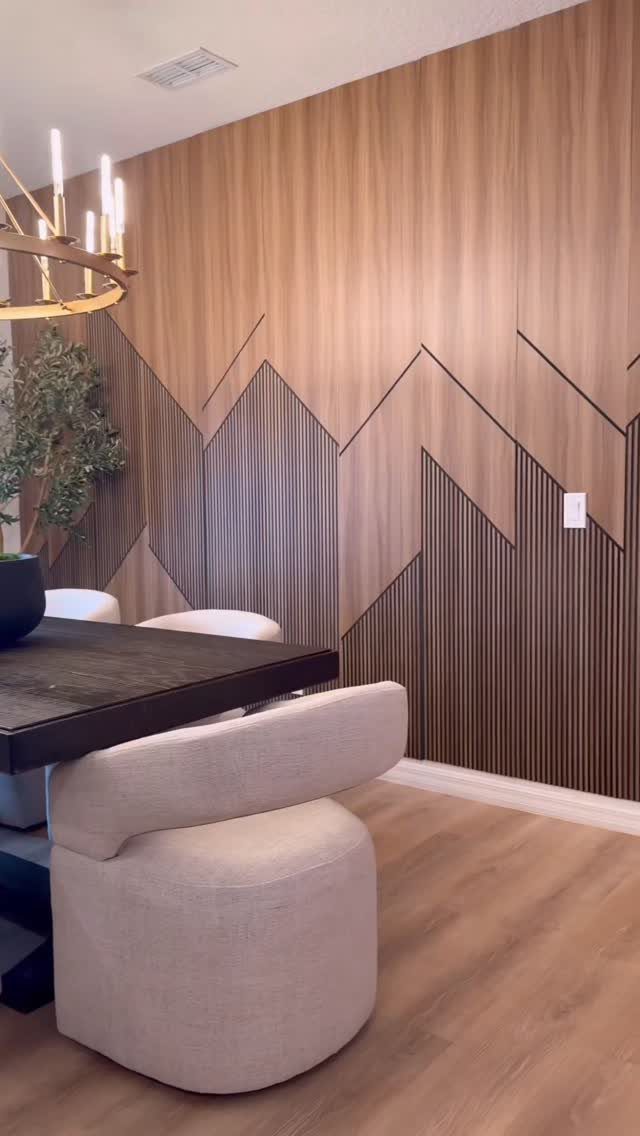
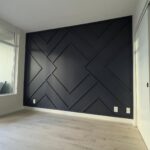
The mountain silhouette reads as modern without being cold, and it works because the contrast is in the wood grain itself, not paint on top.
Dark vertical slats against lighter backing give you the geometry without needing a table saw; you rip strips from 1×3 or 1×4 boards and space them with painter’s tape as a guide.
Board and batten squares are the easier cousin if this pattern feels busy. Same principle, straight lines, no jigsaw work.
Black paint behind the slats, like Sherwin-Williams Tricorn Black, pushes the grain forward the same way a mat does for a photograph.
A dining room suits this because you stare at walls while eating. Bedrooms reward softer shapes.
Dust settles in the grooves, and a feather duster handles it fine until you start skipping cleanings.
9. Backlit Wooden Mountain Sculpture
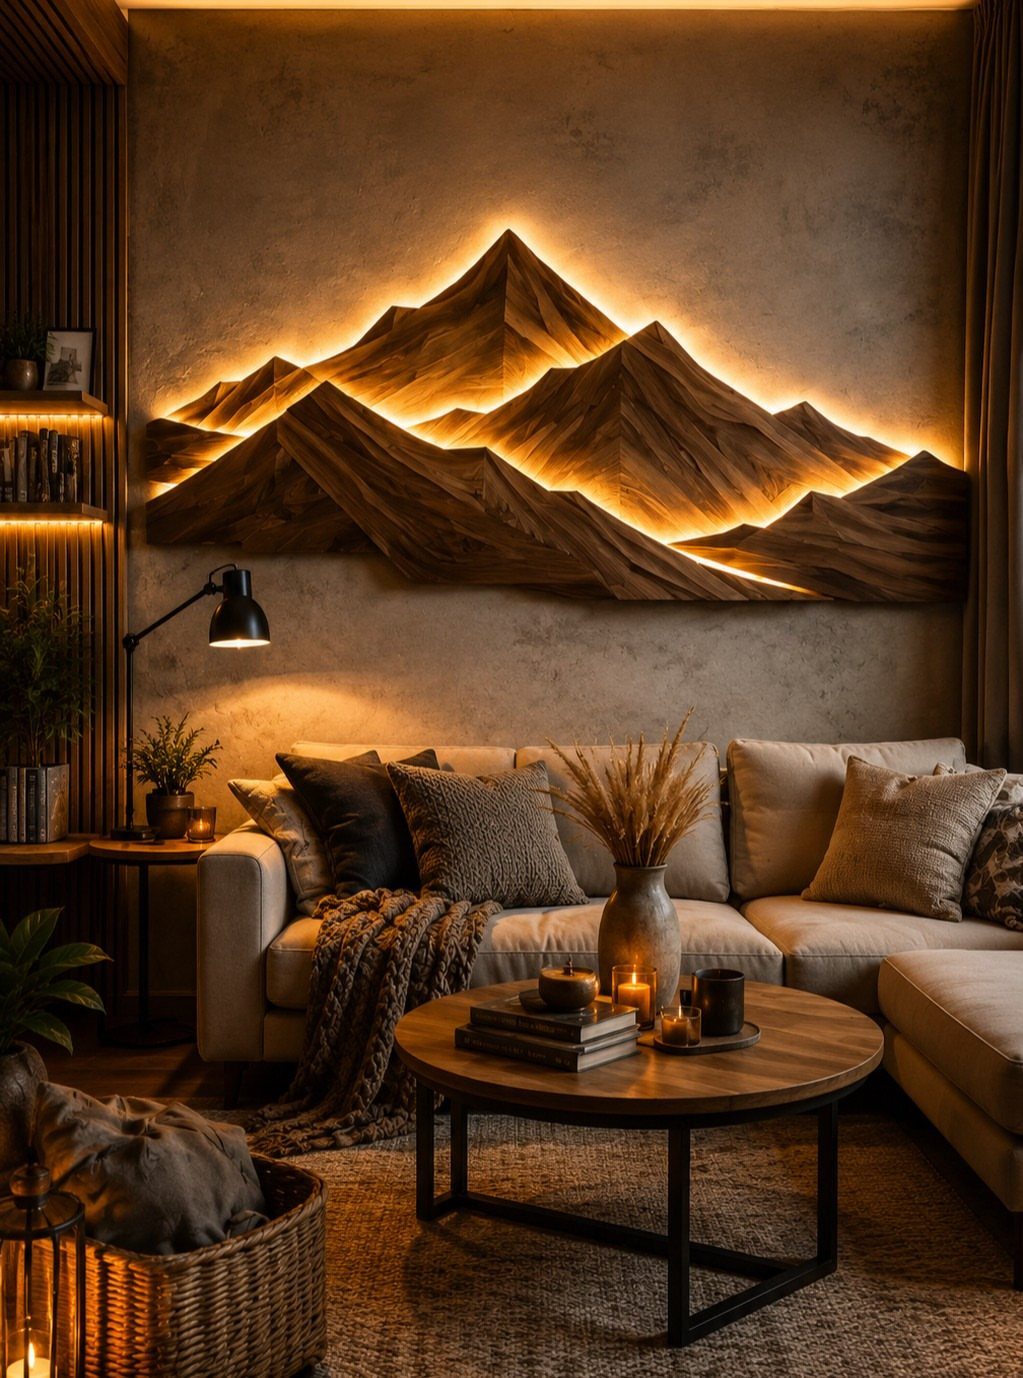
Layered plywood ridges with a warm LED strip tucked behind them give you shadow depth that flat art never manages. The light source stays hidden, so the wall glows rather than the fixture showing.
Plywood thickness drives the look. Thinner stock bends slightly and reads delicate; thicker stock casts harder shadows and needs a stronger French cleat.
You shape the mountain profiles with a jigsaw, sand the cut faces, and stack the layers with construction adhesive and pin nails. The LED channel mounts to the wall first, before any wood goes up.
The wall behind must be flat. Any bow telegraphs through and the light hits uneven.
I’d build this for a room where you already have dimmers; full brightness kills the effect.
10. Framed Driftwood Wall Art
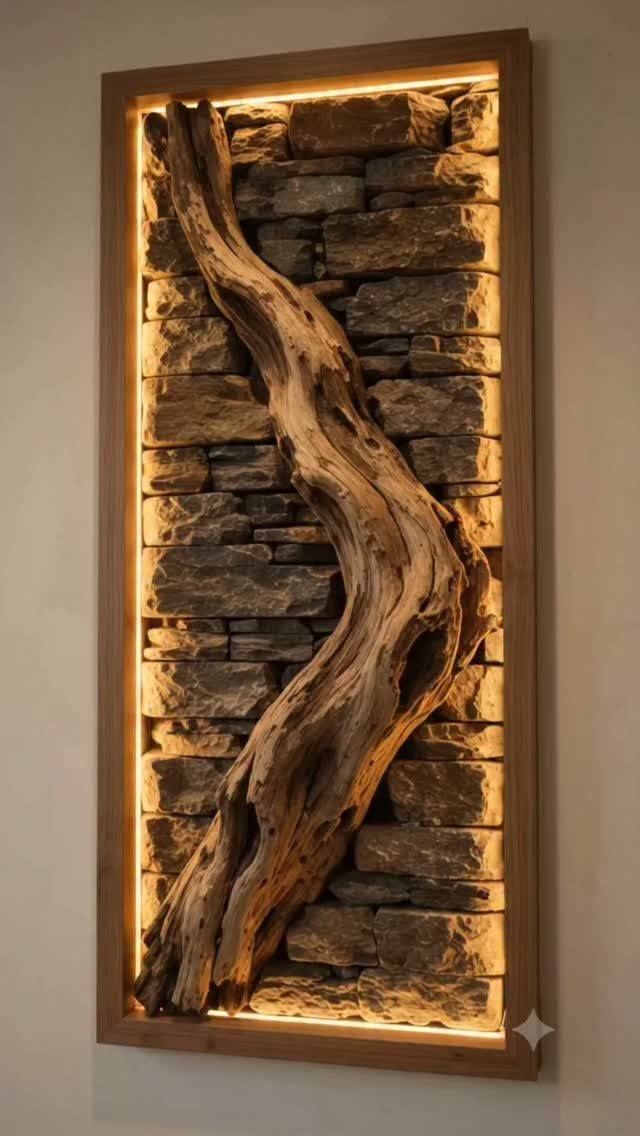
A single piece of driftwood carries enough irregularity that it needs restraint around it. The stone backing and simple frame do that work; without them you have a stick on a wall, which is a harder sell.
Stone veneer sheets, the lightweight kind meant for showers, mount with mastic and give you the texture without hauling real rock. The driftwood screws through pre-drilled holes so you don’t split it.
Warm LED border light, built into the frame rabbet, separates the piece from the wall plane and makes the shadows move at night.
This scales to whatever driftwood you find. Check the wood for active bugs before you bring it inside, or you frame a beetle farm.
Choosing the Right Wood Type
Bathrooms punish wood that cannot handle wet air. Ipe or teak withstand that environment without swelling or rotting, which is why they cost more and earn it.
For living areas, dining rooms, or bedrooms, white oak or walnut handle normal humidity and take stain predictably. The undertone matters: white oak runs cooler, walnut warmer, and either one changes under your room’s light.
American oak resists stains and dents well enough for high-traffic walls. Pine costs less and weighs less, though the knots telegraph through paint if you go that route.
Color variation in reclaimed barn wood is whatever the demolition yard has on hand; you work with the tone you get rather than one you choose.
Teak and acacia hold up outside if you extend the wall to a covered patio. Marine oil on any of these buys you time, but it does not turn pine into teak.
DIY Installation Tips
Measure wall height at three points: left, center, right. Ceilings are rarely flat, and the gap you hide with molding depends on knowing the worst spot before you cut.
Pre-cut panels speed this up; the edges are factory square, which matters more than the wood grade when you are butting seams.
Big-box panels come in enough styles to match most looks without a table saw. Painted drywall in good condition takes peel-and-stick backing straight; textured walls need skim-coating first or the adhesive grips the peaks and leaves valleys.
For permanent installs, a brad nailer through the tongue of tongue-and-groove stock hides fasteners completely. Rent one for a weekend; the purchase price only pays off past 3 rooms.
Construction adhesive behind each panel prevents the hollow knock if a nail misses.
Budget-friendly Options
Most of these ideas land under $1,000 if you do the labor yourself. Peel-and-stick real wood planks run the lowest per square foot and skip tool rental entirely; clean the wall, press, and level as you go.
Summer humidity swells a plank and opens a gap by fall.
The texture reads the same at conversation distance; you lose the nail holes and the story.
For slat walls, ripping your own strips from 1×3 or 1×4 common boards costs less than buying pre-cut lattice. Renting a table saw gives you control over width and species for a day rate.
Paint the wall behind black before you mount; it hides inconsistencies in your spacing without premium wood.
Biophilic Design Trends
Wood walls fit a broader shift toward materials that read as found rather than manufactured.
The grain variation, the knots, the way light moves across ridges at different hours: these things register as outdoor phenomena transplanted inside, which is why they show up in spaces meant for slowing down.
The combination of wood grain and trailing growth reads as deliberate biophilia rather than decoration; you maintain it by watering the plants and dusting the slats, same as any other wall that hosts life.
Frequently Asked Questions
What are wood designs on walls called?
Wood accent walls or wood wall panels are the common names.
Accent walls interrupt a flat surface with slats or planks to pull the eye toward one spot; paneling carries grain across an entire wall and ends up looking like part of the structure itself.
What are the design options for wooden walls?
Options run from reclaimed barn wood and minimalist paneling with hidden hardware to staggered horizontal slats, 3D carved panels, vertical slat walls, hexagonal shelves, horizontal planks, geometric inlay, backlit plywood sculpture, and framed driftwood art.
Faux panels, peel-and-stick backing, and rip-your-own lumber versions exist for tighter budgets or rentals.
What is the new trend for walls?
Biophilic design and sustainable materials are trending, which means wood that looks alive and sourced with less waste.
What is the best type of wood for walls?
That depends on the room. Ipe or teak withstand wet environments, so bathrooms and exterior-adjacent mudrooms make sense for those.
White oak or walnut suit living areas and bedrooms where moisture stays controlled.
For a wall that sees humidity swings, thermal-treated poplar darkens to something like walnut at a lower price point, though getting it up takes either a millworker or more patience than I had on my first try.